How to Create a Skydiving Video with Luma AI's Modify Video Feature
Follow this detailed tutorial to learn how to create a skydiving video using Luma AI's Modify Video feature. Each step is illustrated with images to guide you through the process of transforming a simple scene into an exhilarating skydiving experience.
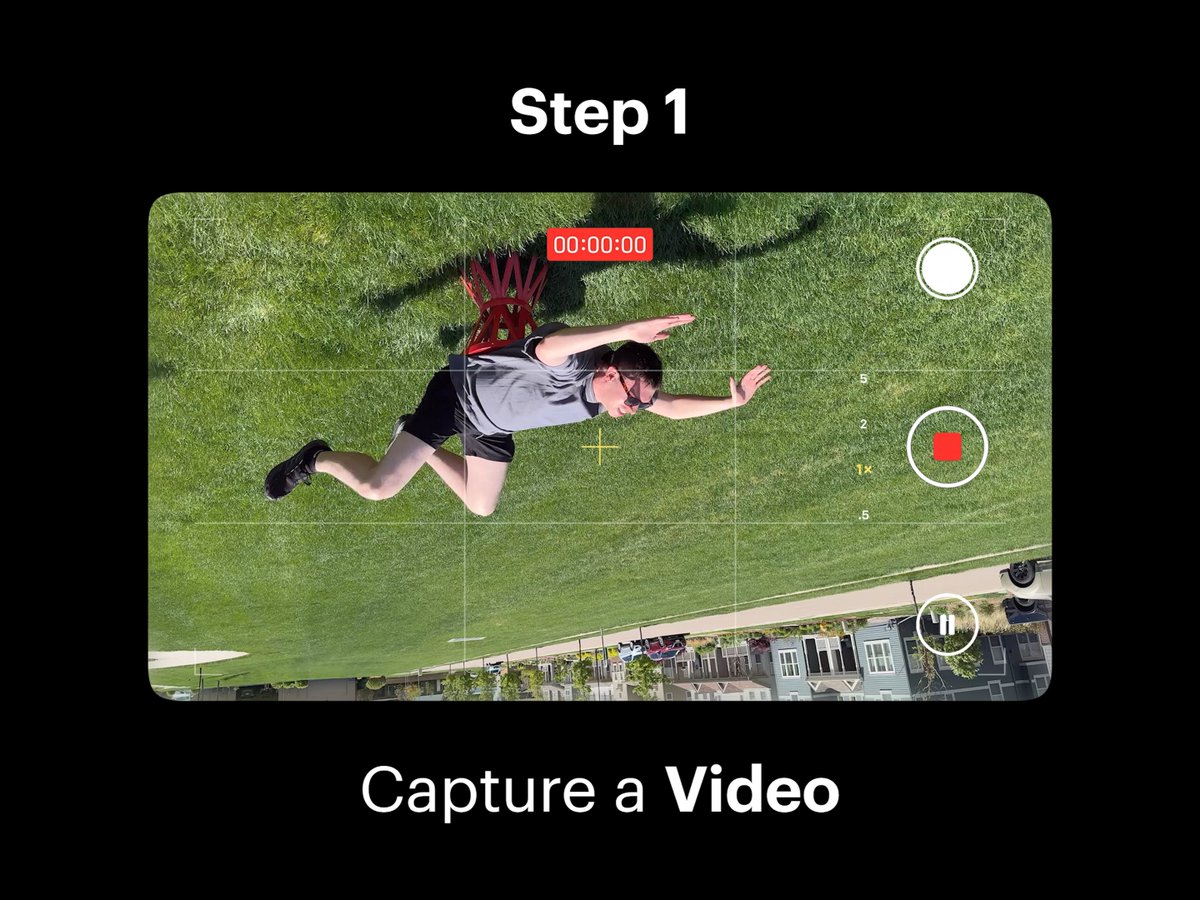
Step 1: Capture a Video
Capture a video upside down of a friend lying facing upwards on a stool or table in an open space, flailing their arms and legs as if they were falling from the sky. This initial footage is essential for creating the skydiving effect.
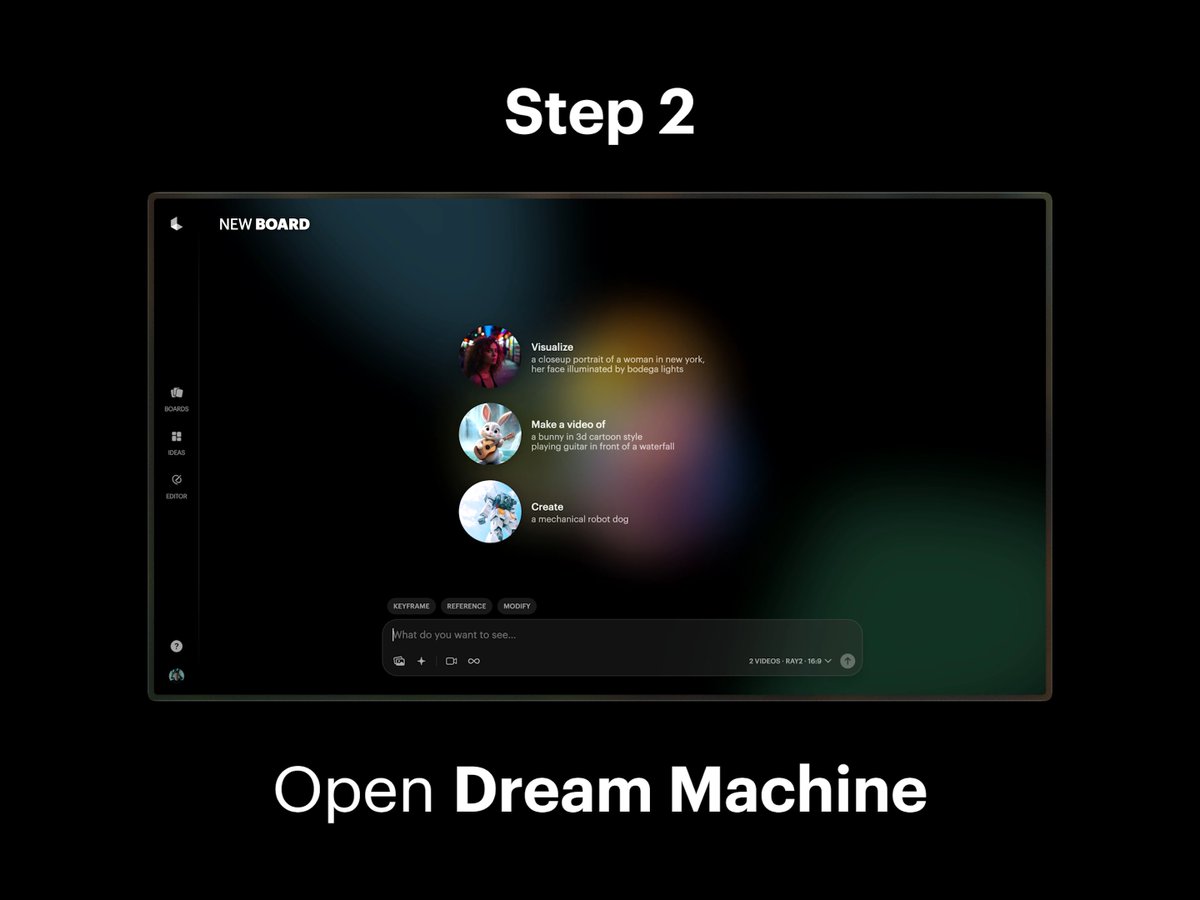
Step 2: Open Dream Machine
Open Dream Machine and create a new Board. This step sets up the environment for modifying your video.
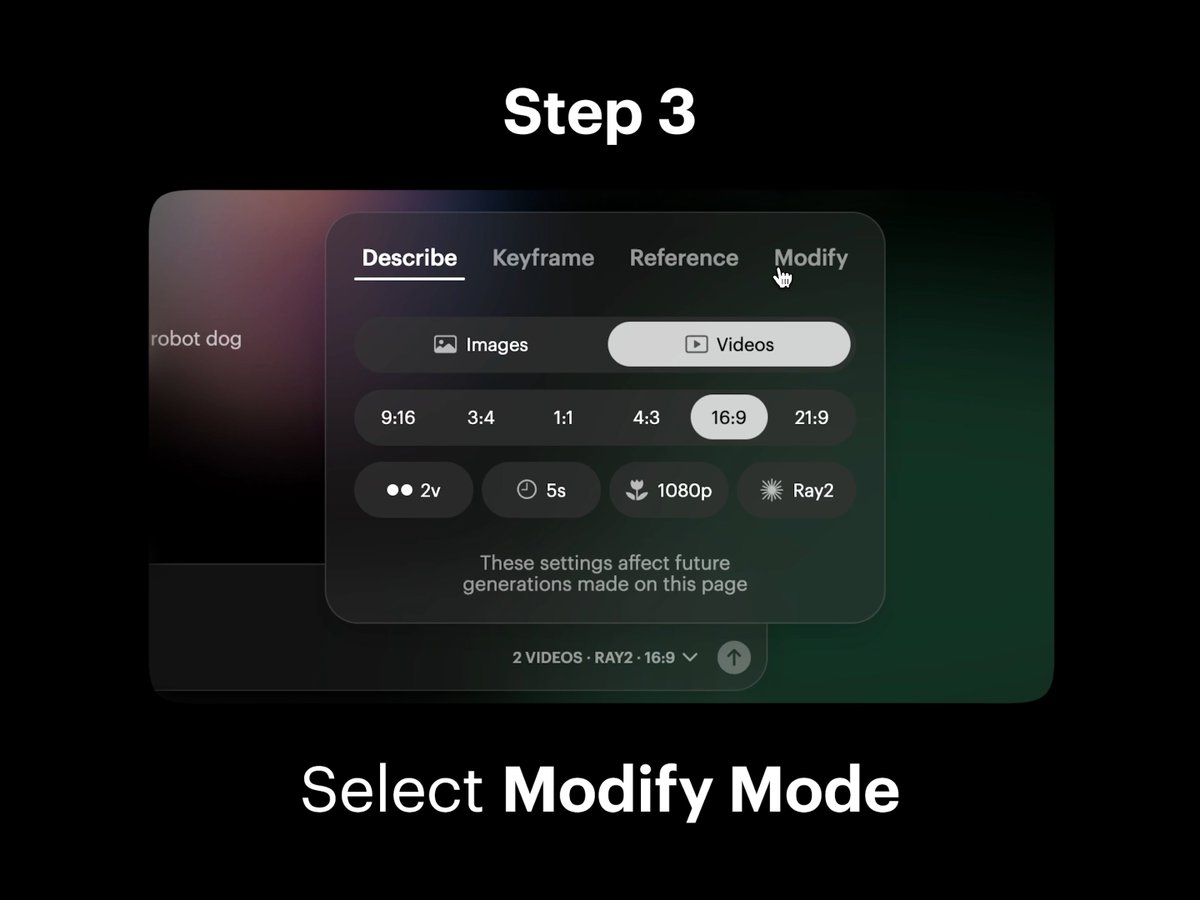
Step 3: Select Modify Mode
Select the Modify option in composer settings within Dream Machine to prepare for video editing.
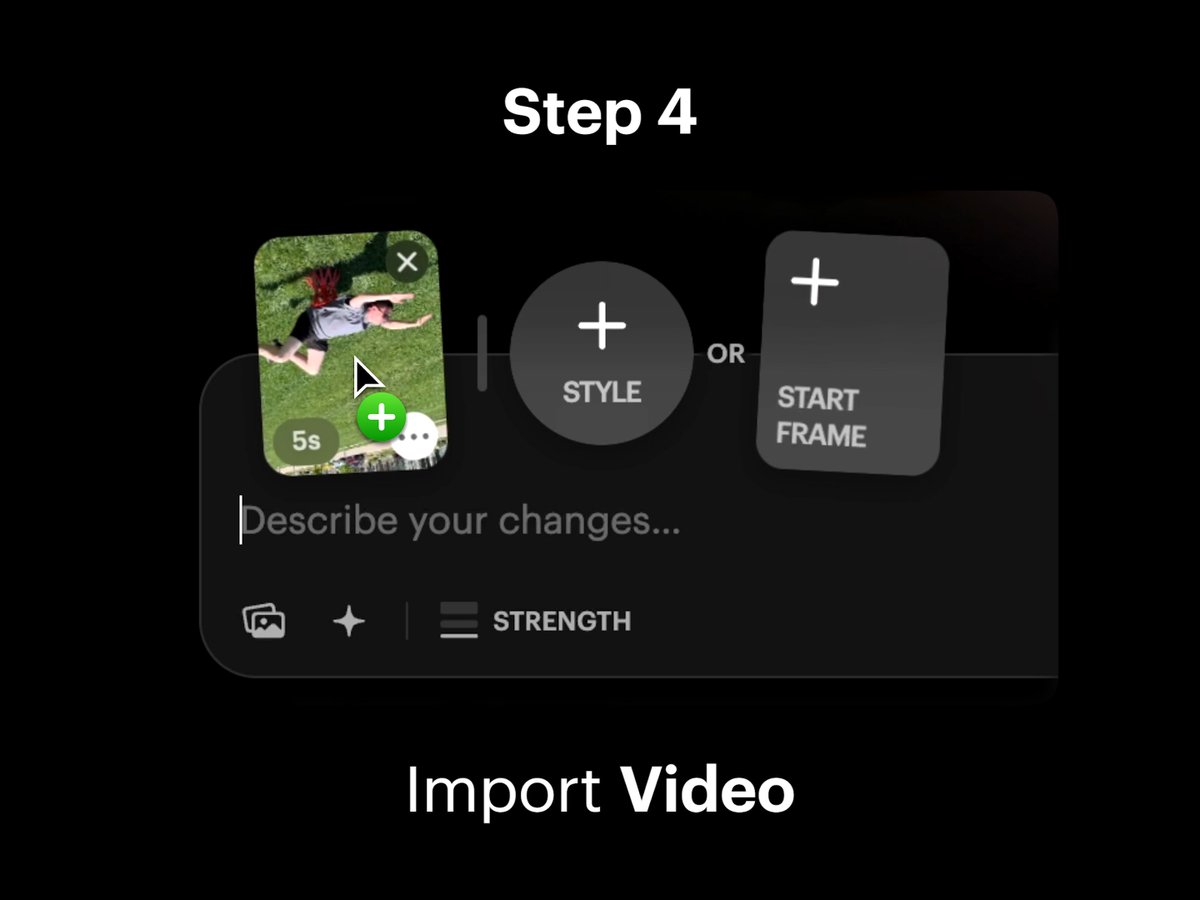
Step 4: Import Video
Import or drag and drop your captured video onto the blank Video Card in the composer. This integrates your footage into the editing process.
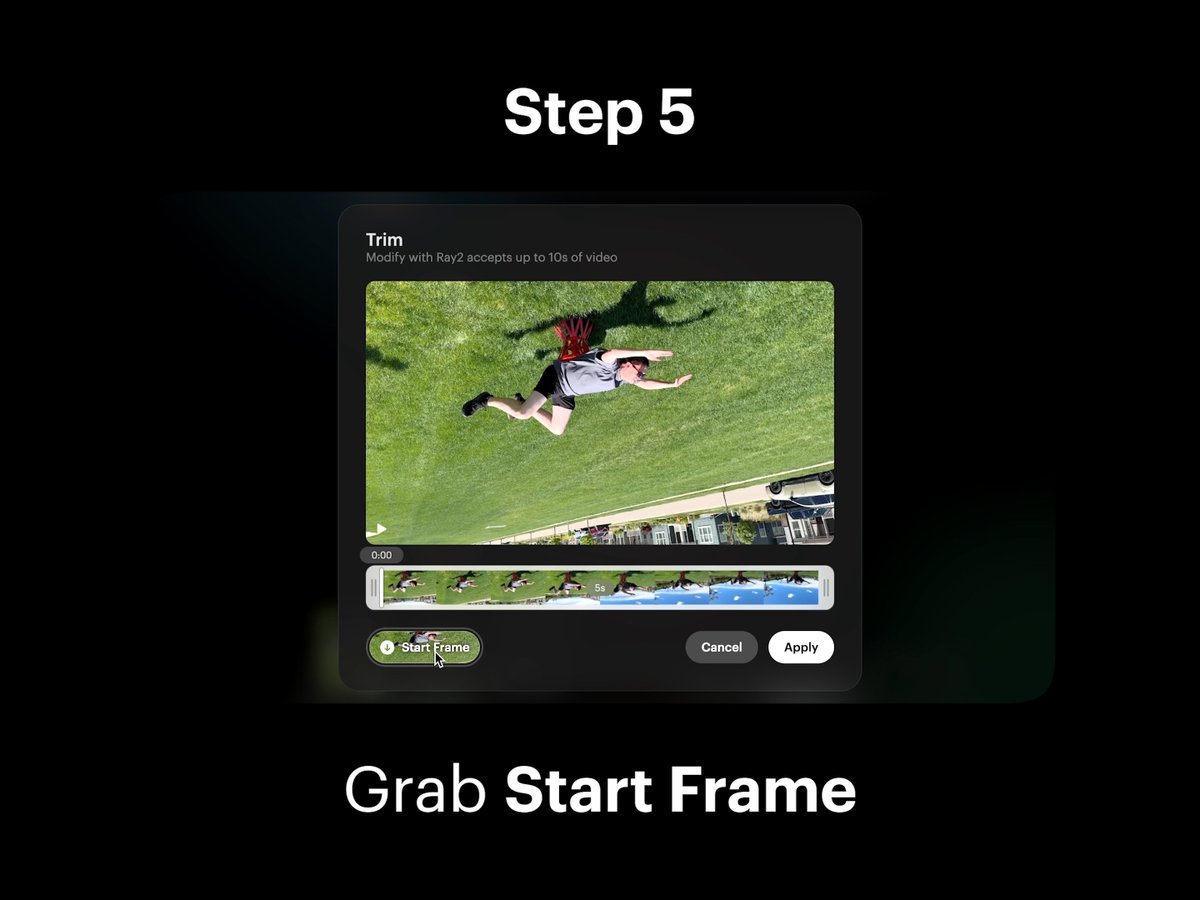
Step 5: Open Trim View
Select the Video Card to open Trim View. Then, select the “Start Frame” button to download your Start Frame for further editing.
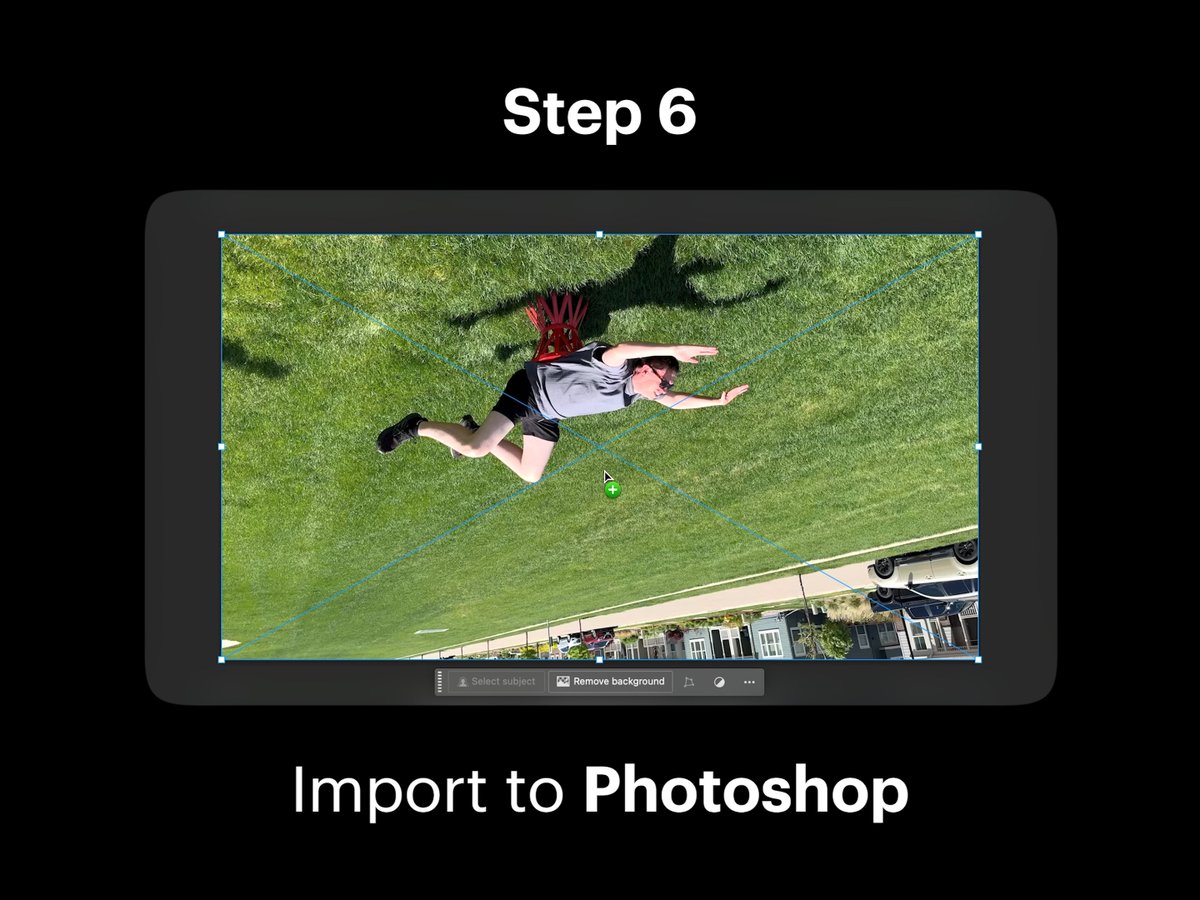
Step 6: Import to Photoshop
Import your Start Frame into Photoshop. This step allows for detailed image editing to refine the skydiving effect.
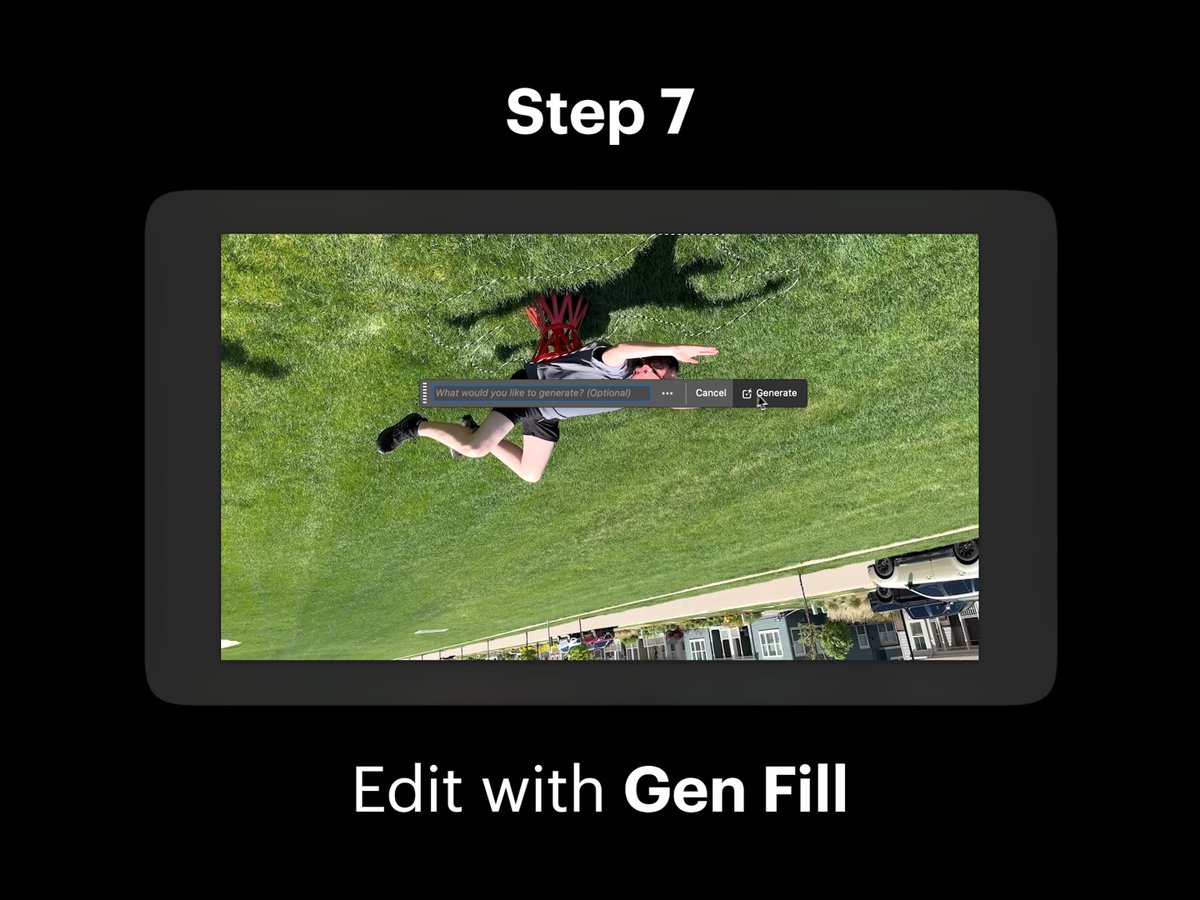
Step 7: Edit with Gen Fill
Using Gen Fill in Photoshop, edit your scene and remove the support that your friend is lying on and any other details you envision to create the surrounding environment. Once completed, export your Edited Start Frame.
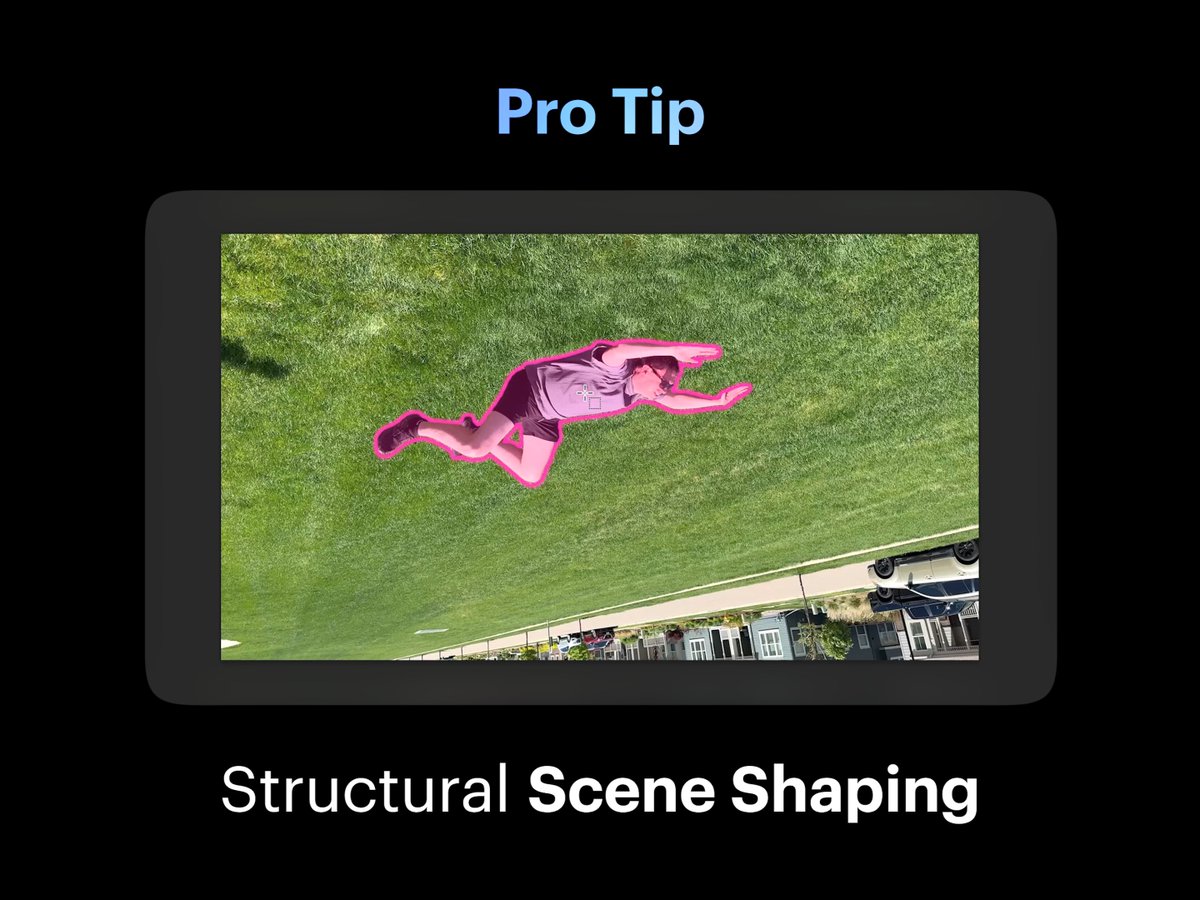
Pro Tip: Structural Scene Shaping
Your edits do not need to be exact. The goal is to roughly shape the overall look and general structure you want to later be retextured with finer details. This tip enhances the flexibility and creativity of your video editing.
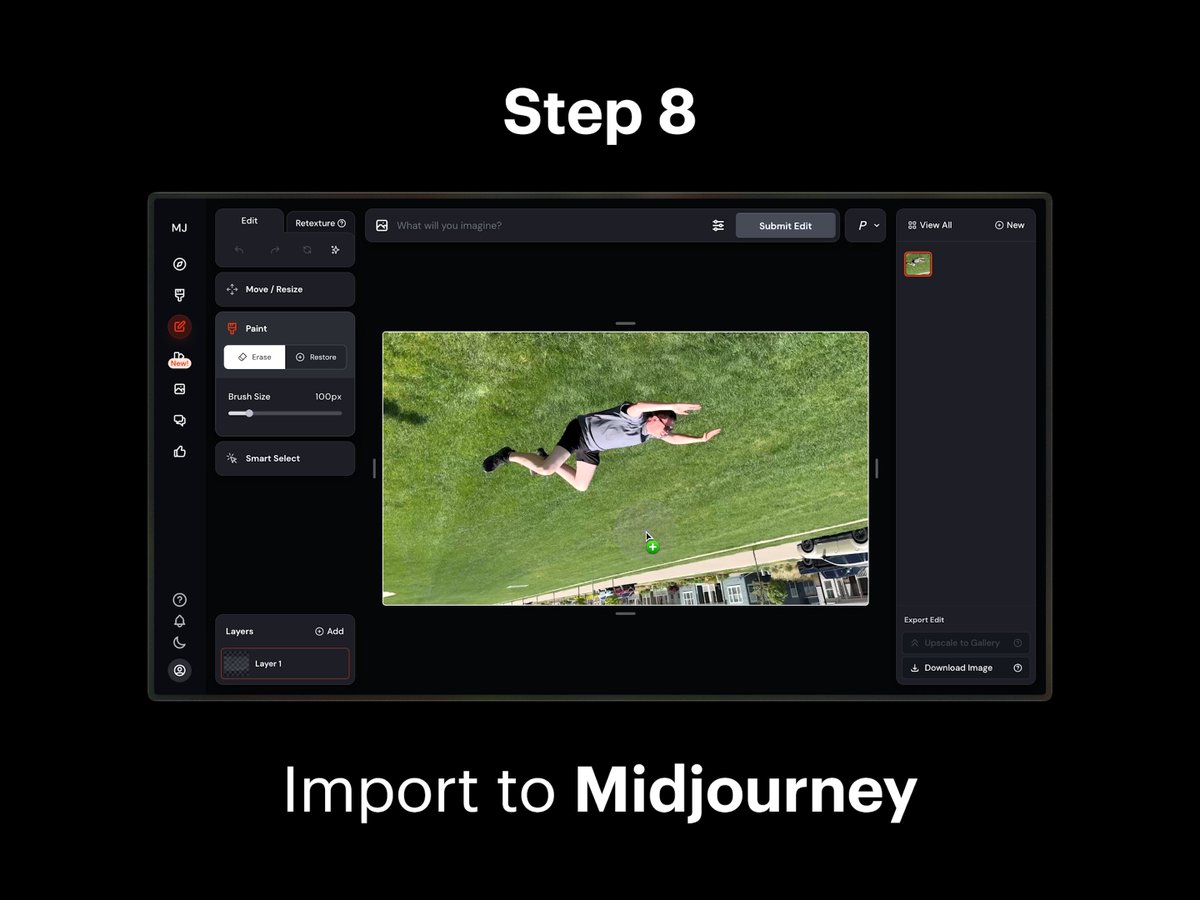
Step 8: Import to Midjourney
Import your Edited Start Frame from Photoshop into Midjourney Edit, or any image editor. Select the Retexture button to refine the details.
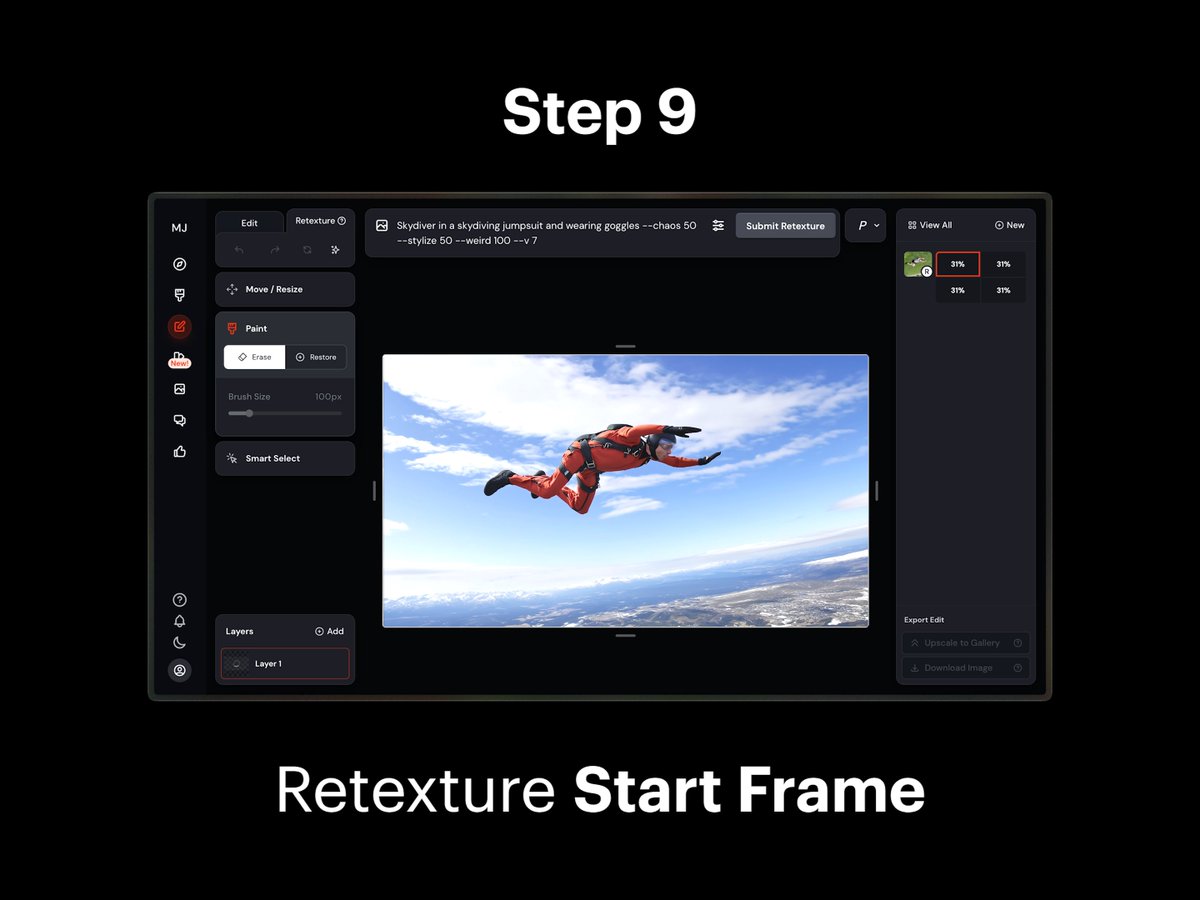
Step 9: Retexture Start Frame
In Midjourney, create a prompt to retexture your Edited Start Frame. Include your envisioned details for the subject, environment, style, mood, lighting, and more. Select the Submit Retexture button to generate your New Start Frame. Once completed, download the image.
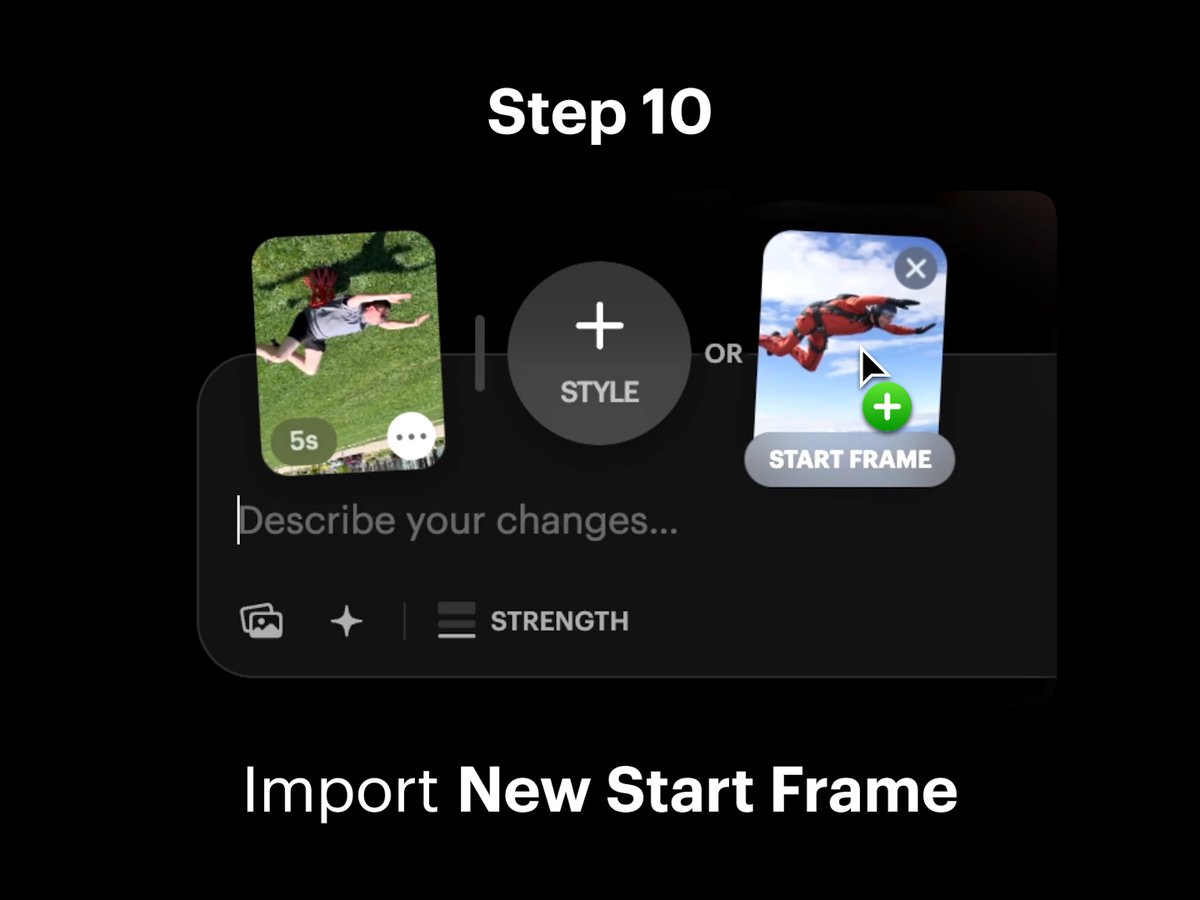
Step 10: Import New Start Frame
In Dream Machine, import your New Start Frame onto the Start Frame Card next to your original video. This step prepares for the final modification.
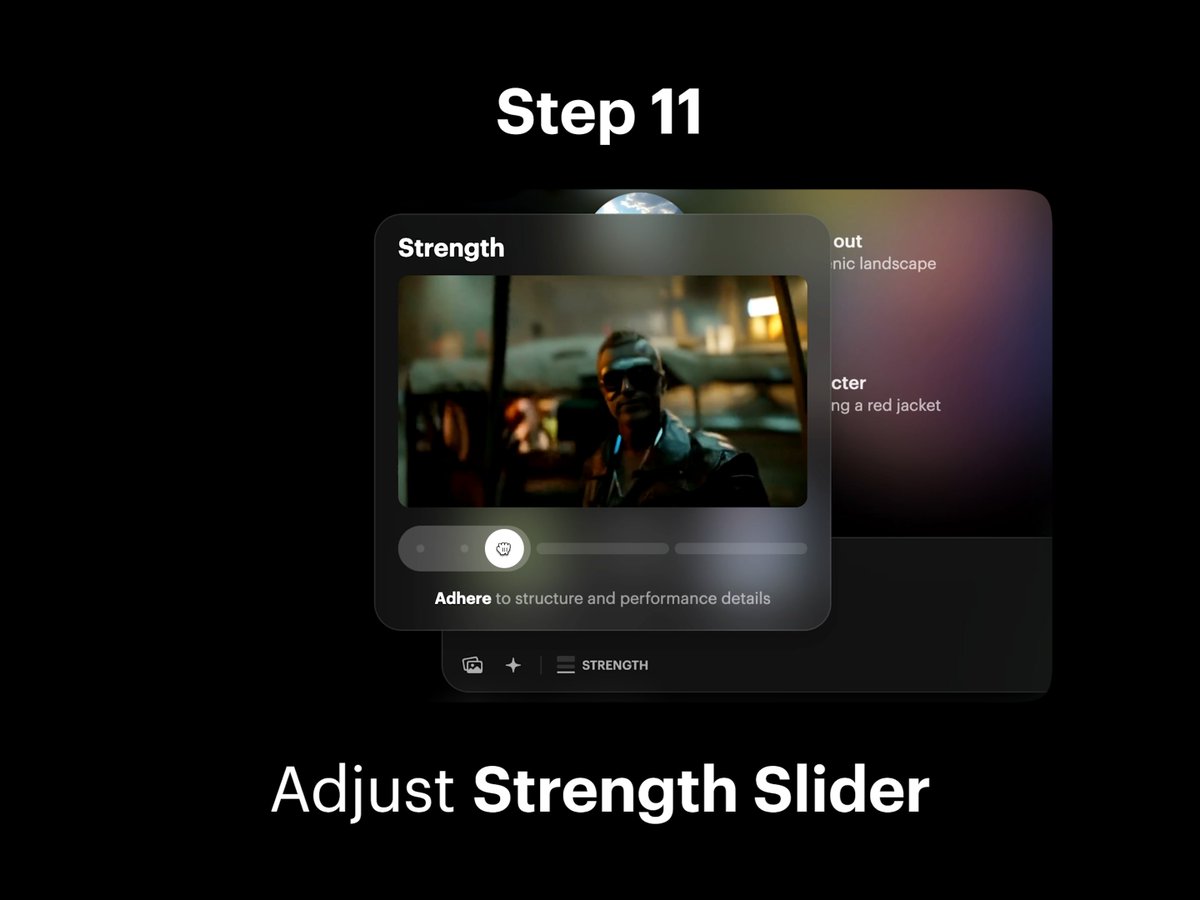
Step 11: Adjust Strength Slider
Adjust the Strength slider to select an intensity level for the modification. This fine-tunes the skydiving effect.
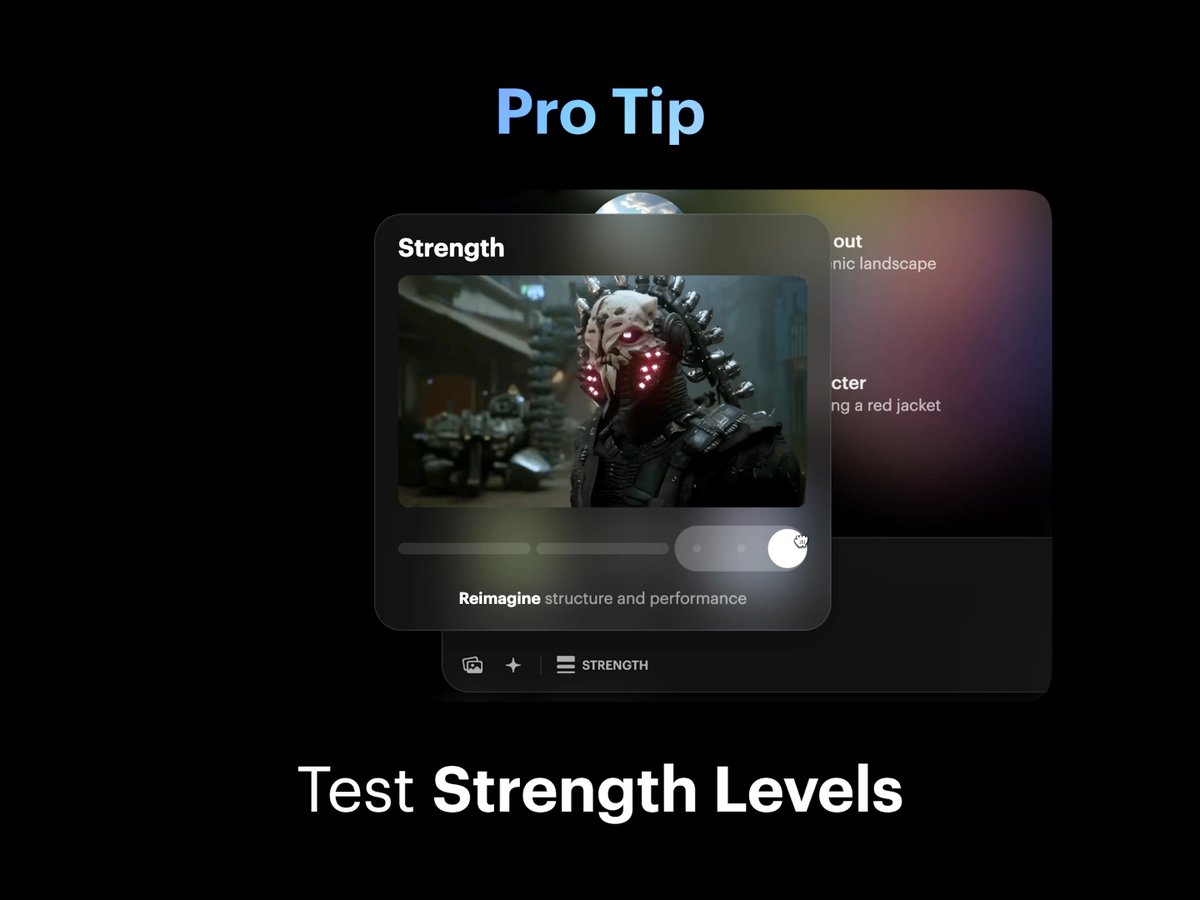
Pro Tip: Test Strength Levels
Dial it low to preserve detail. Turn it up to dream bigger. Experiment with Strength intensity levels across the slider from Adhere, Flex, and Reimagine to see which works best for your video.
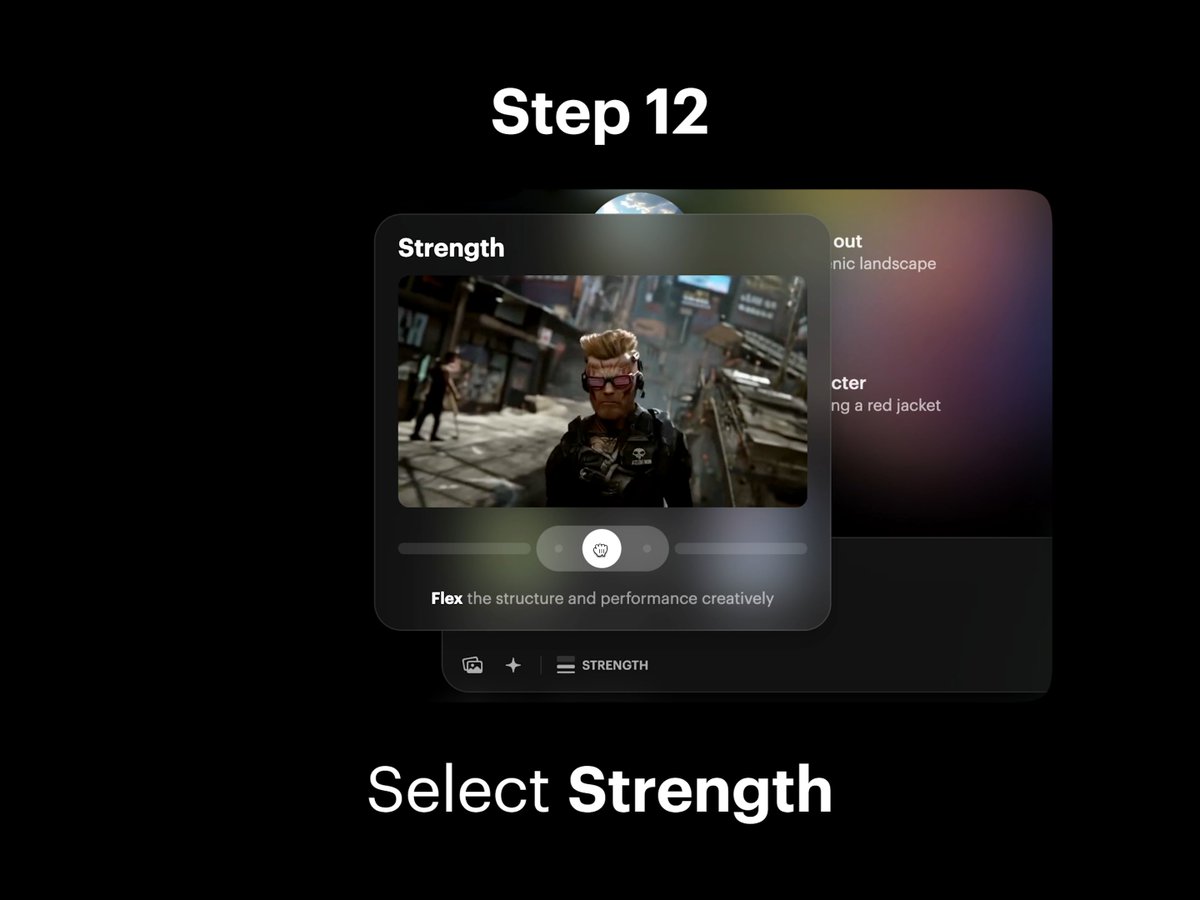
Step 12: Select Strength
Select and lock in your preferred Strength level. Flex 2 was used for this video example to achieve the desired effect.
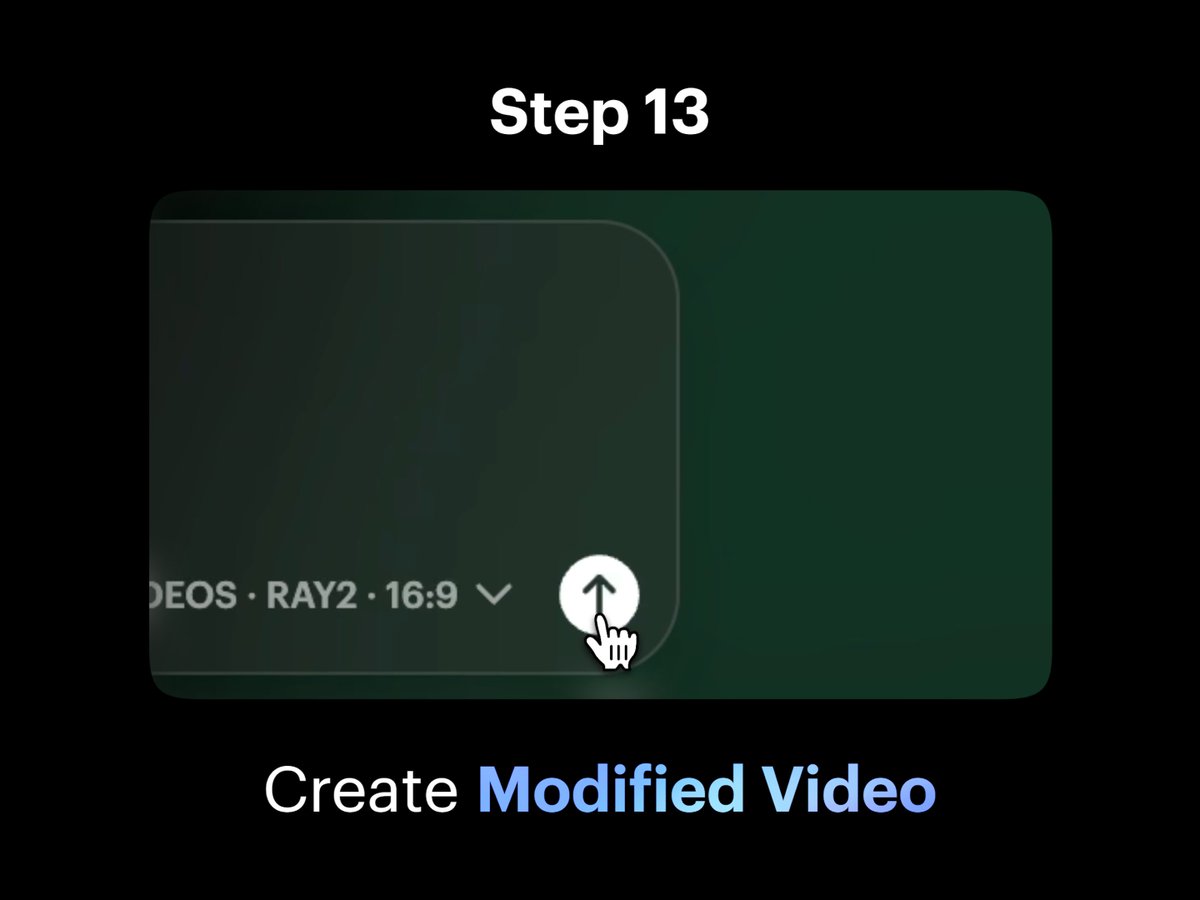
Step 13: Create Modified Video
Tap the Create button in the composer to make your skydiving modified video come to life. This final step completes the process.