How to Levitate with Modify Video
Create the illusion of floating up into the sky with #Ray2 Modify Video.
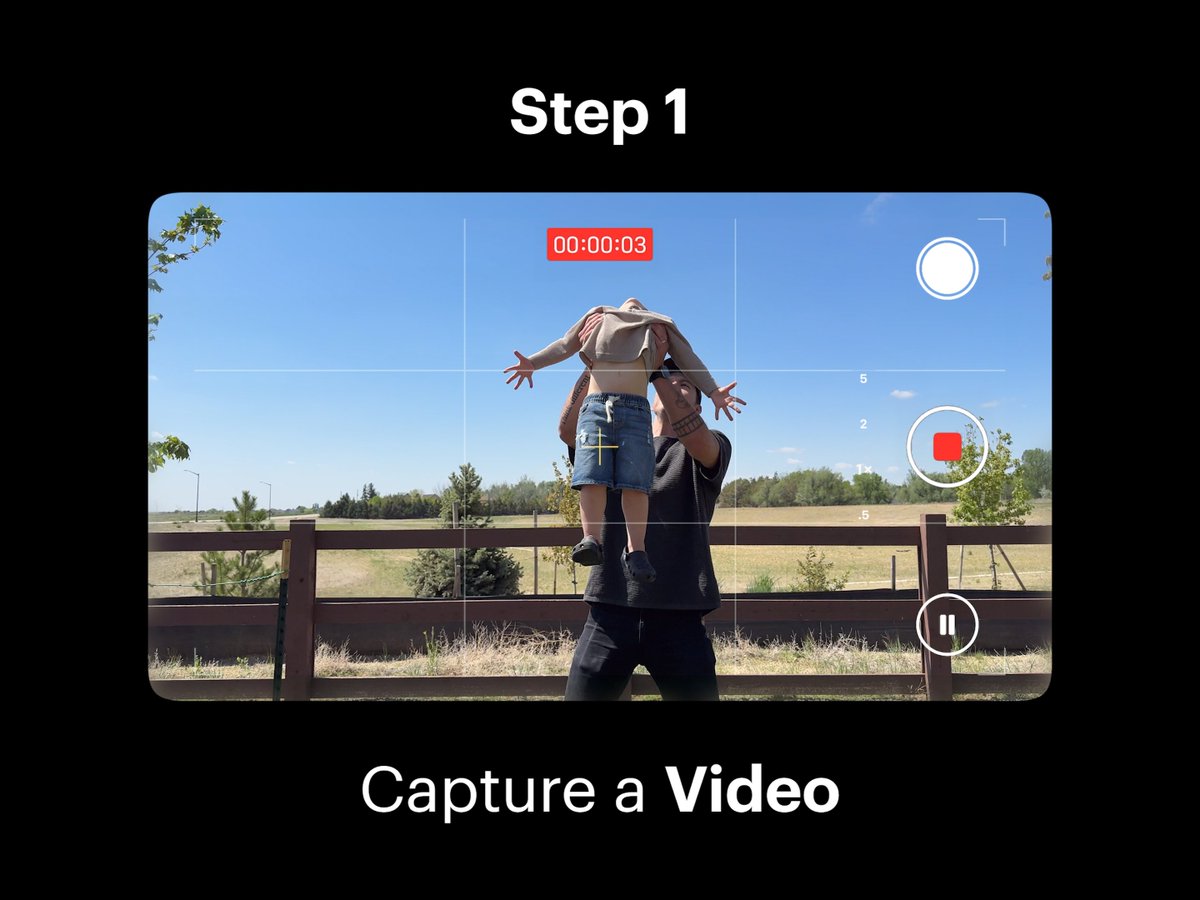
Step 1: Capture a Video
Capture a video of a friend holding and lifting up their child to simulate being levitated up into the sky. This initial step is crucial for creating the illusion of levitation.
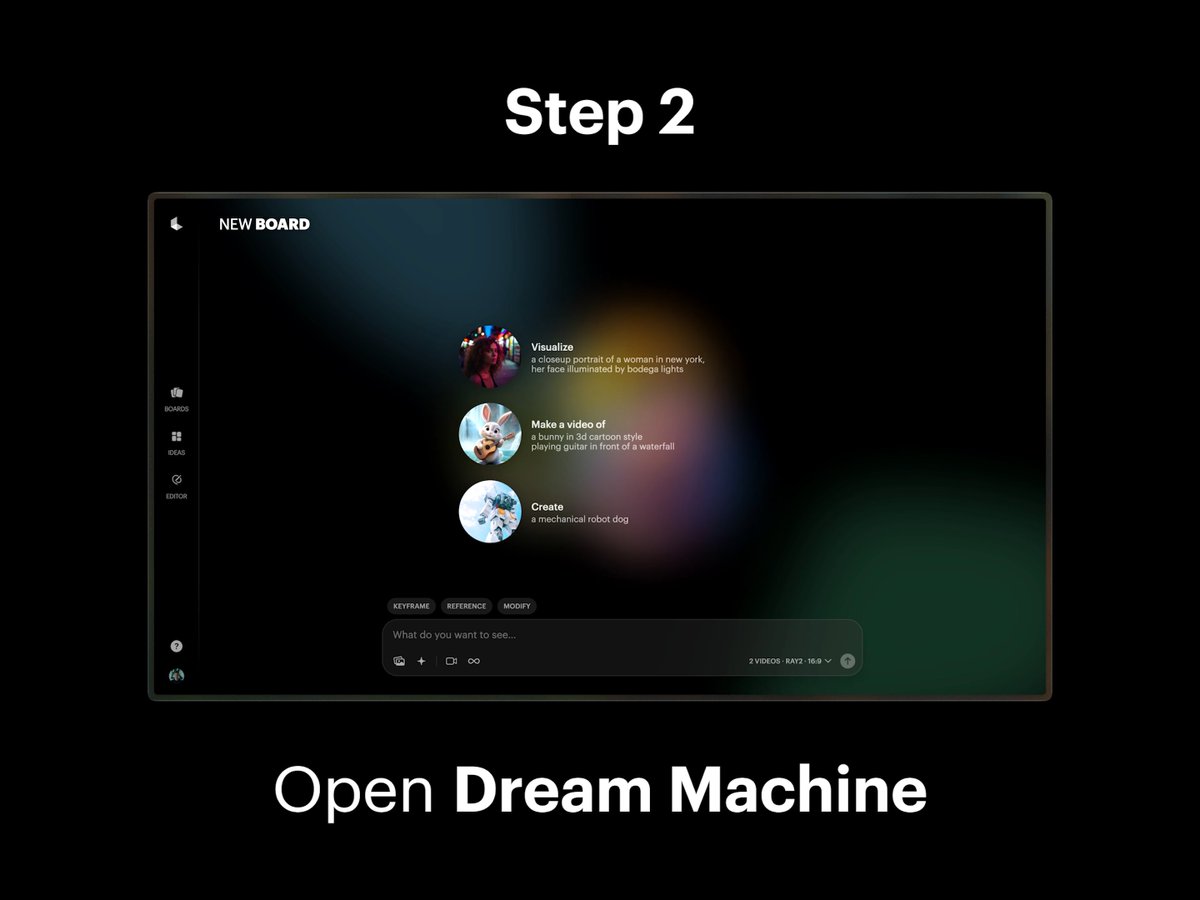
Step 2: Open Dream Machine
Open Dream Machine and create a new Board. This platform will help you modify your video to achieve the desired effect.
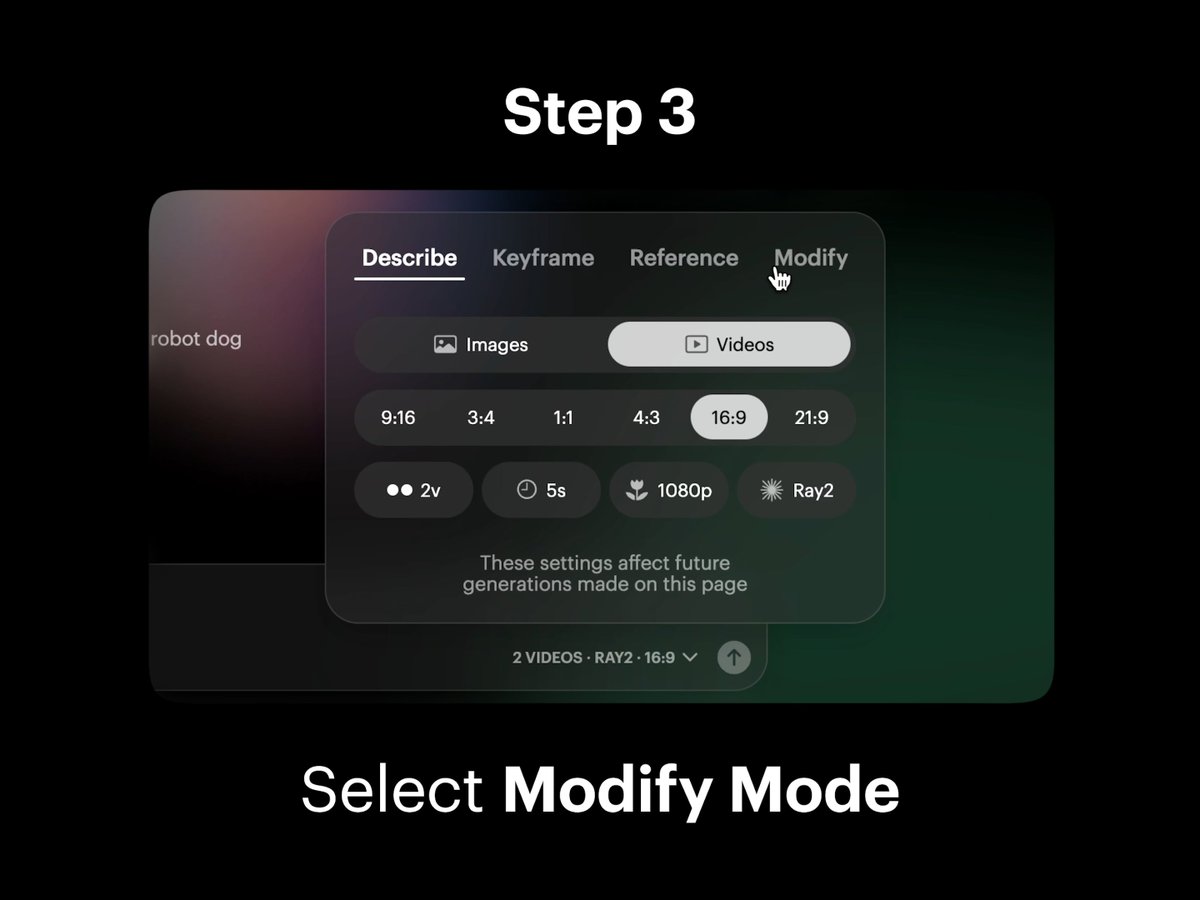
Step 3: Select Modify Option
Select the Modify option in composer settings within Dream Machine to begin the video editing process.
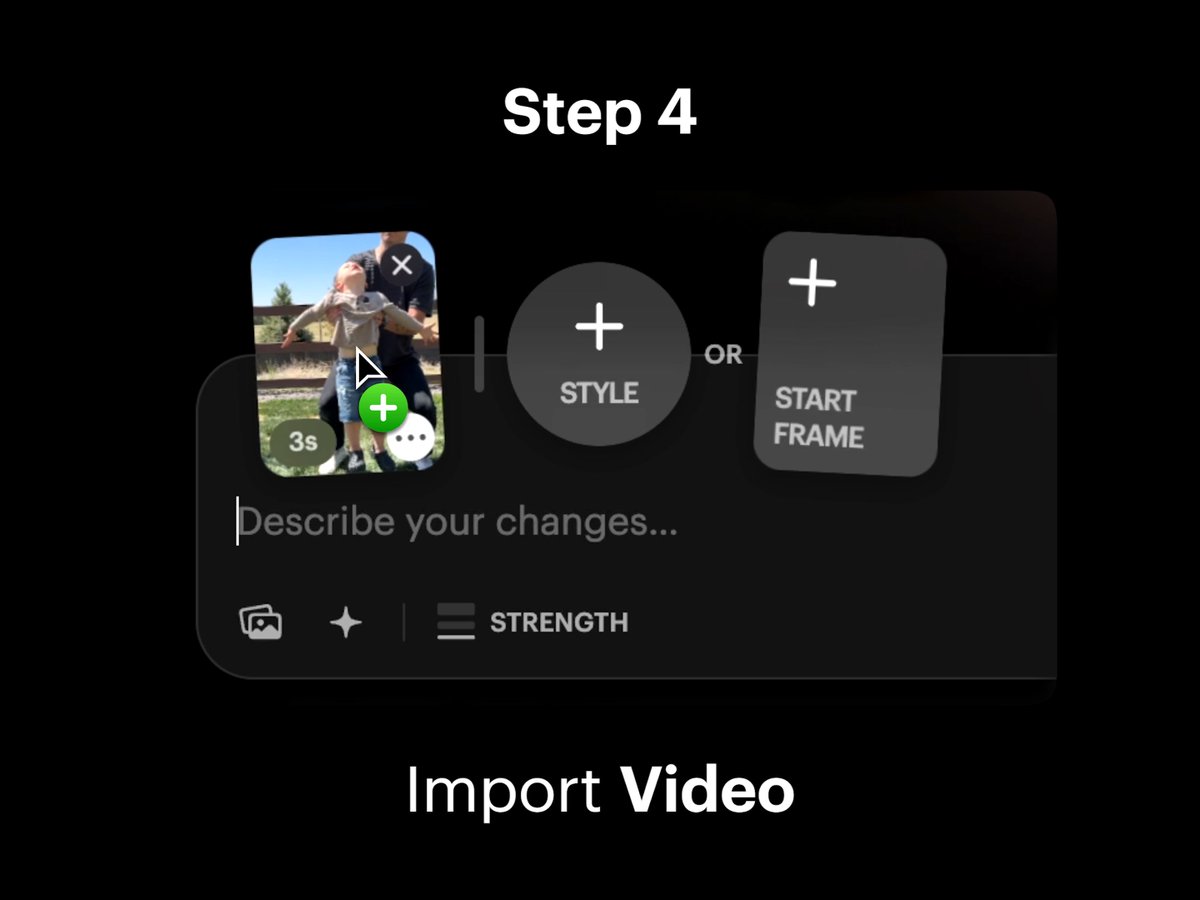
Step 4: Import Video
Import or drag and drop your captured video onto the blank Video Card in the composer. This step integrates your footage into the editing software.
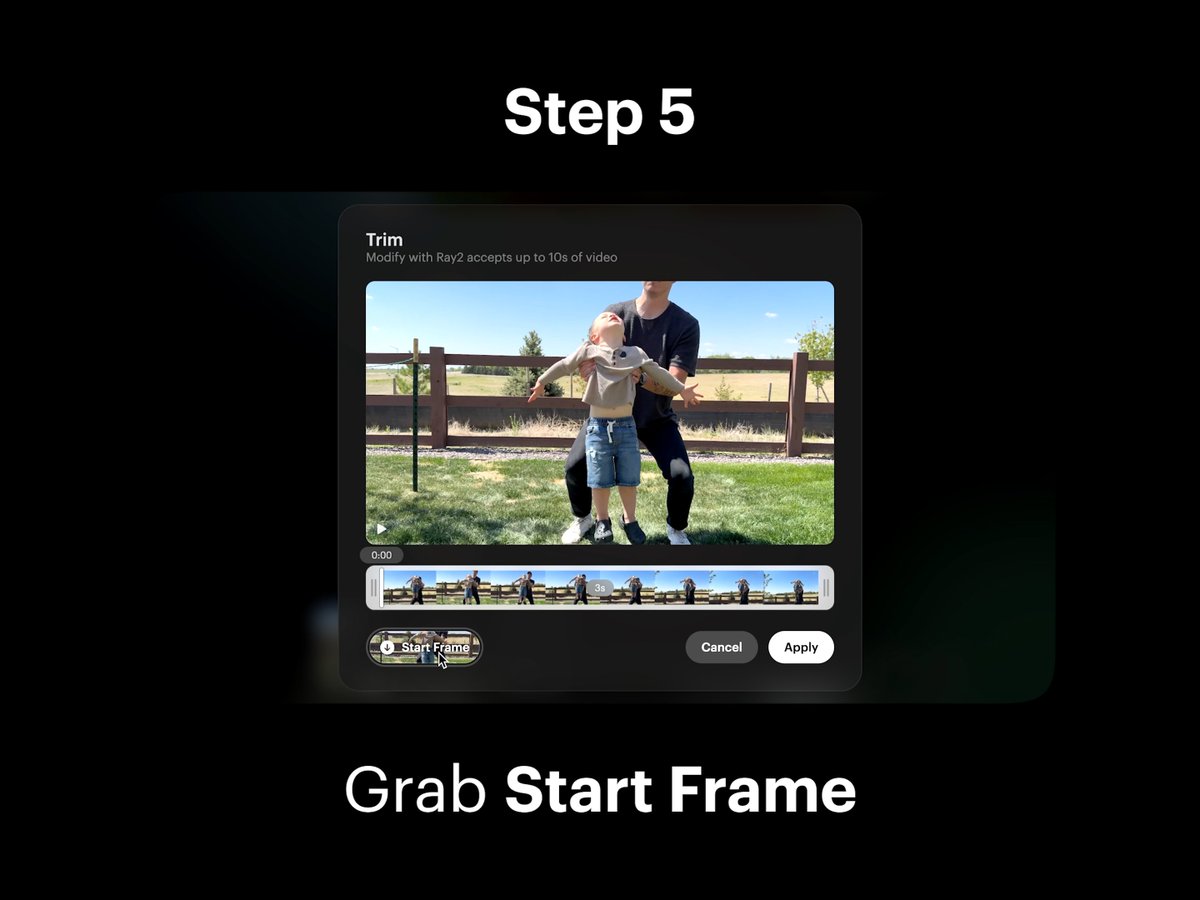
Step 5: Trim and Select Start Frame
Select the Video Card to open Trim View. Then, select the “Start Frame” button to download your Start Frame for further editing.
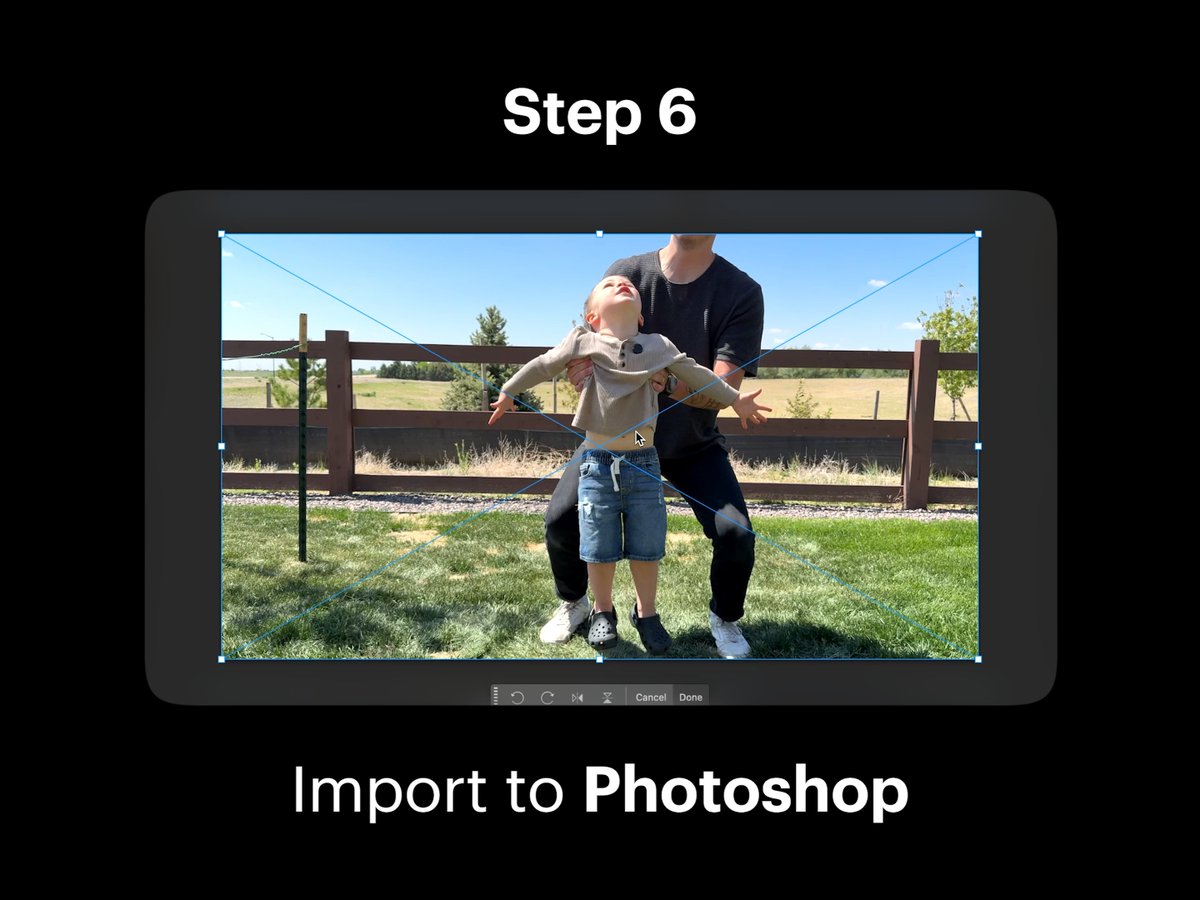
Step 6: Import to Photoshop
Import your Start Frame into Photoshop. This step allows for detailed image editing to refine your levitation effect.
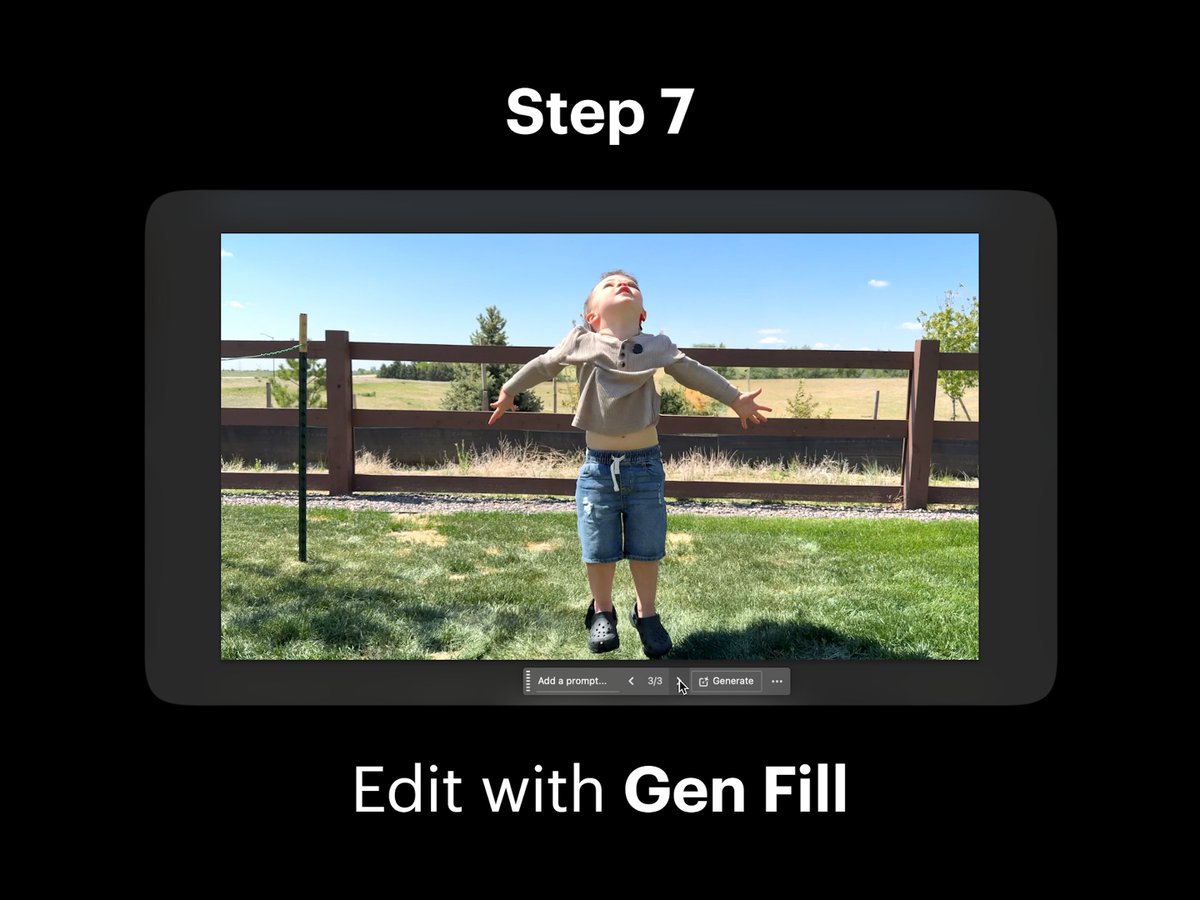
Step 7: Edit with Gen Fill
Using Gen Fill in Photoshop, edit your scene to remove the person holding the floating character, then isolate them. This enhances the levitation illusion.
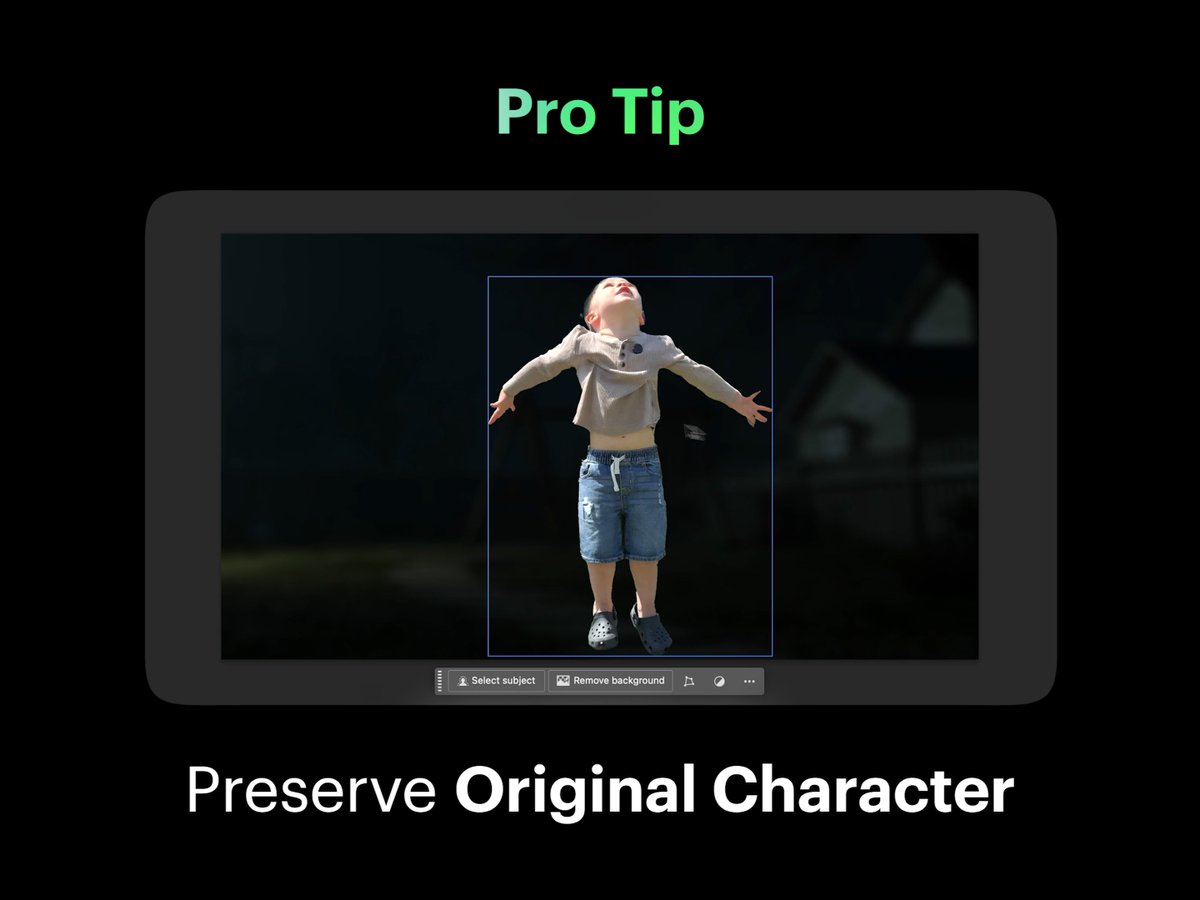
Pro Tip: Preserve Original Character
Preserve the original character in the scene to maintain authenticity while editing. This tip ensures the levitation effect looks natural.
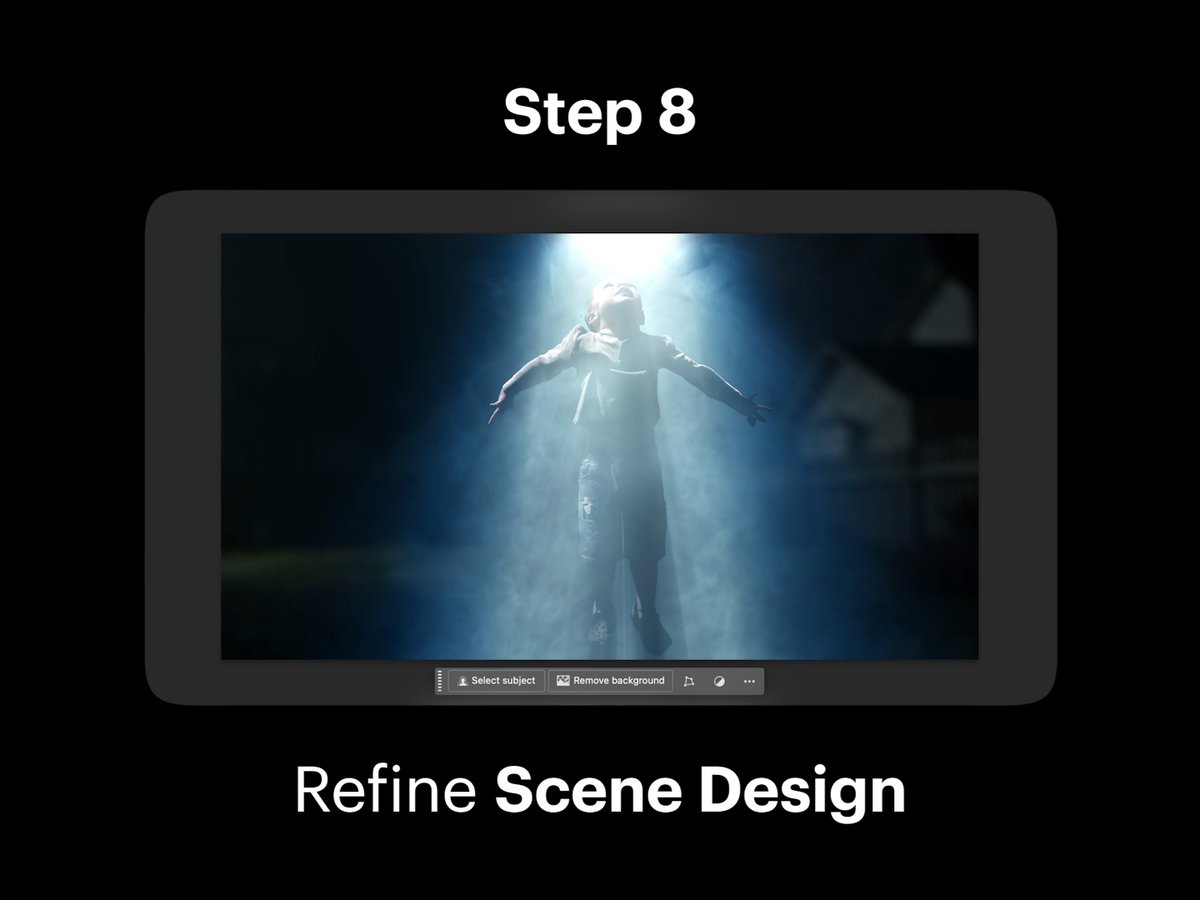
Step 8: Refine Scene Design
Refine the scene design by adding elements such as a darker background and a beam of light shining down on the floating character. This step enhances the visual impact.
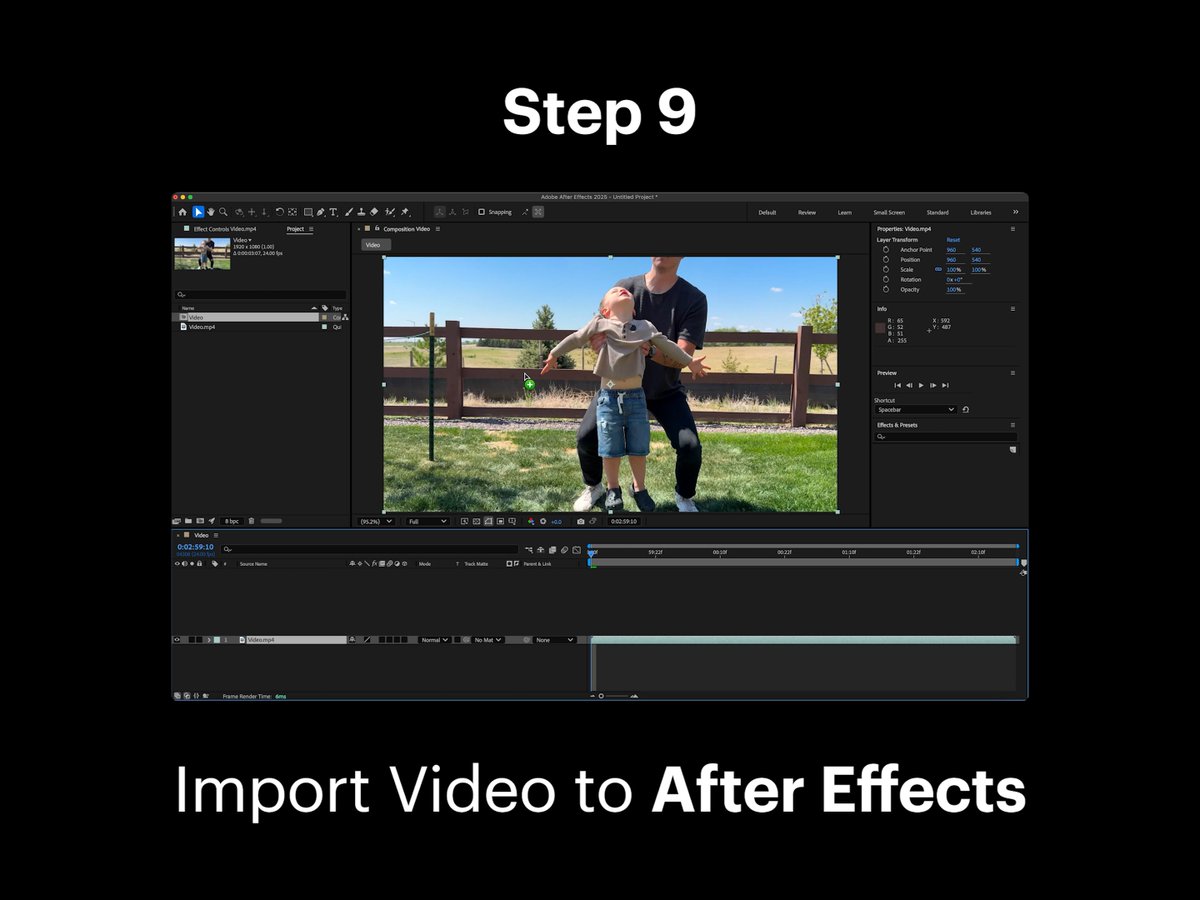
Step 9: Import to After Effects
Import the original video into After Effects. This software is essential for advanced video editing and effects.
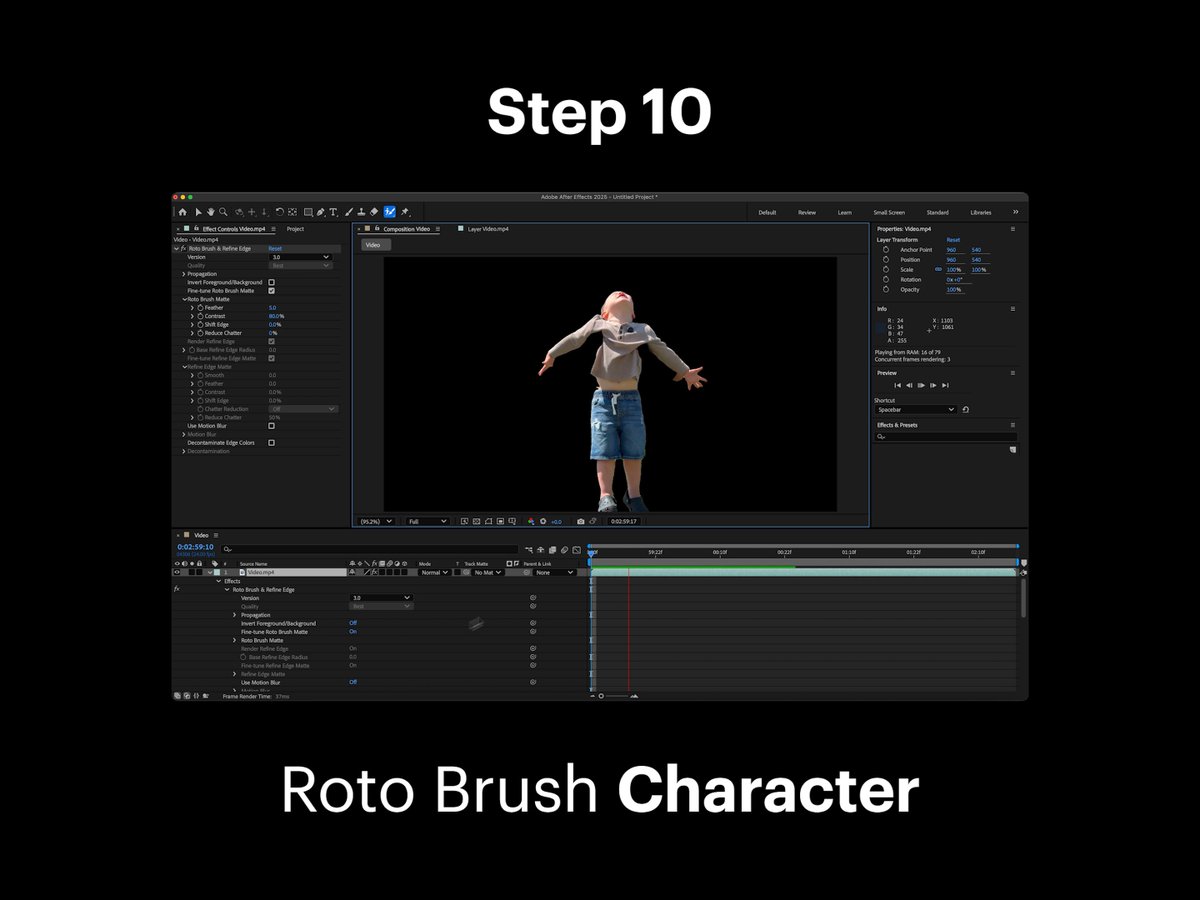
Step 10: Roto Brush Character
Use the Roto Brush tool in After Effects to isolate the character in the video. This step is crucial for precise editing.
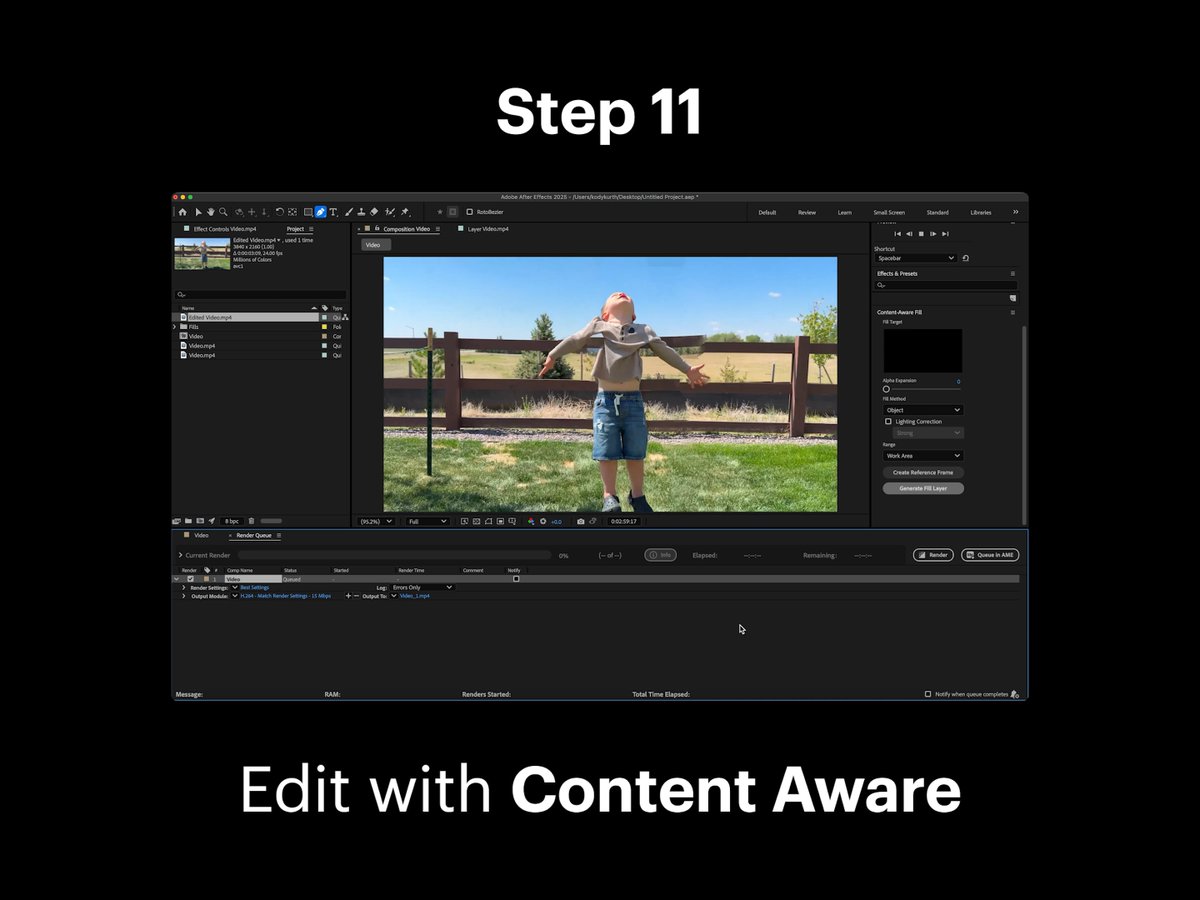
Step 11: Edit with Content Aware
Using Content Aware in After Effects, replace the person holding the floating character with a new background. Save and export your edited video.
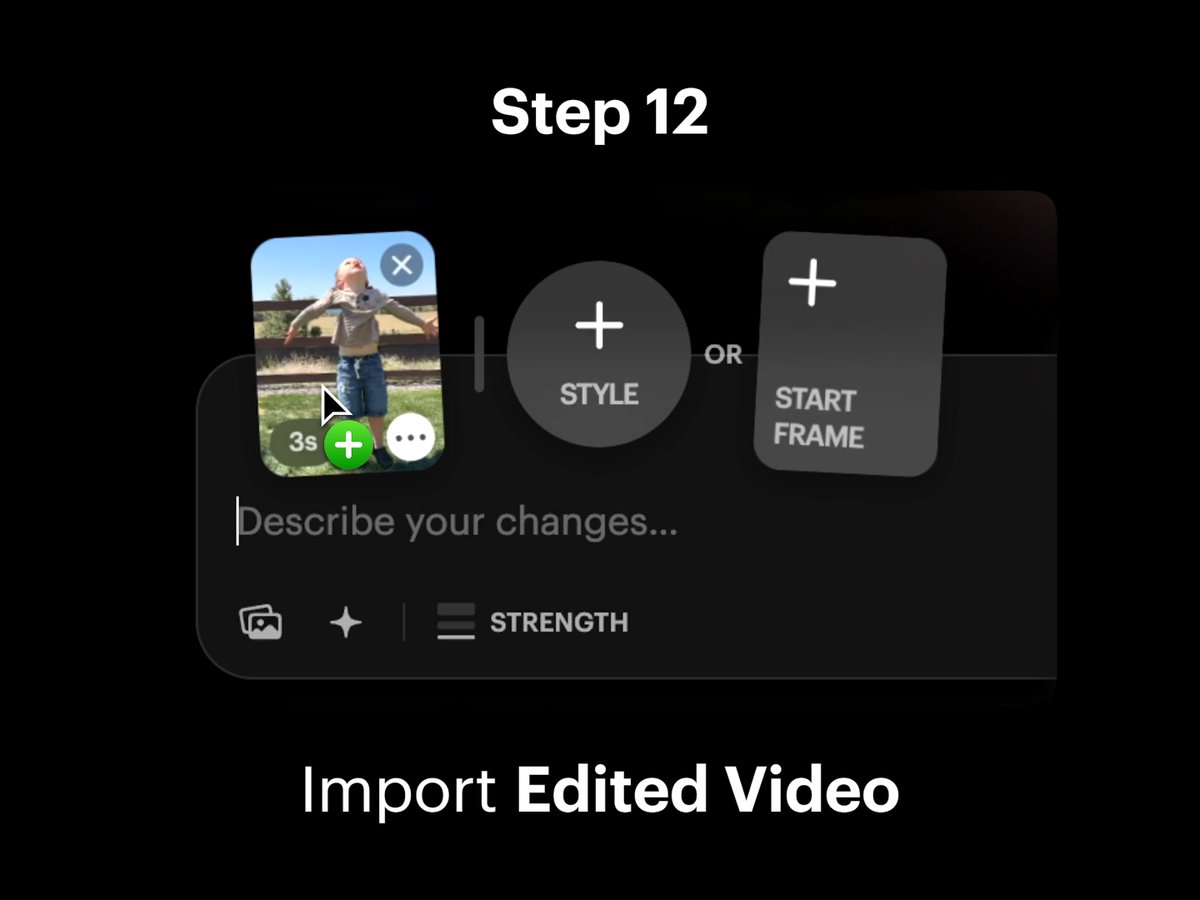
Step 12: Import Edited Video
In Dream Machine, import your new edited video. This step integrates your refined footage back into the platform.
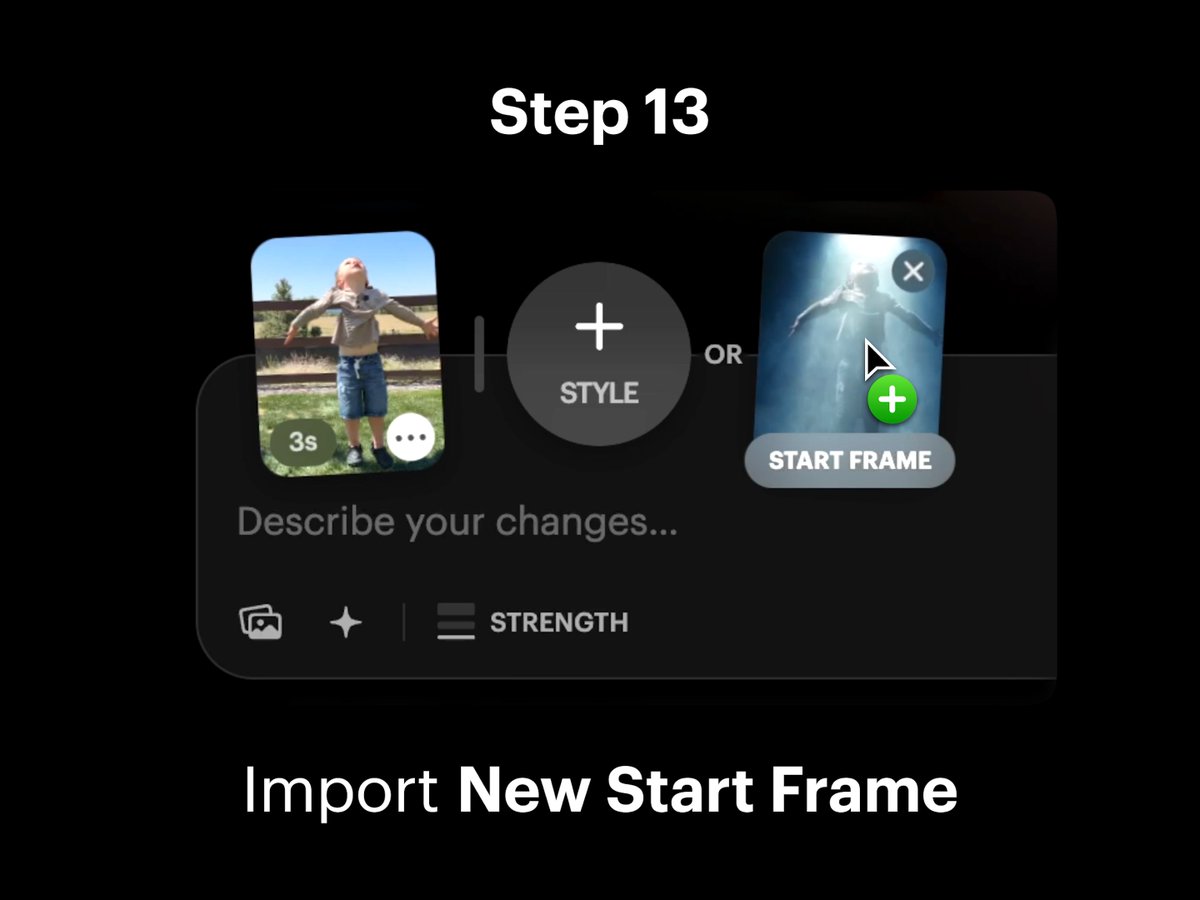
Step 13: Import New Start Frame
Import your New Start Frame onto the Start Frame Card next to your edited video in Dream Machine.
Step 14: Adjust Strength
Adjust the Strength slider to select an intensity level for the modification. This step fine-tunes the levitation effect.
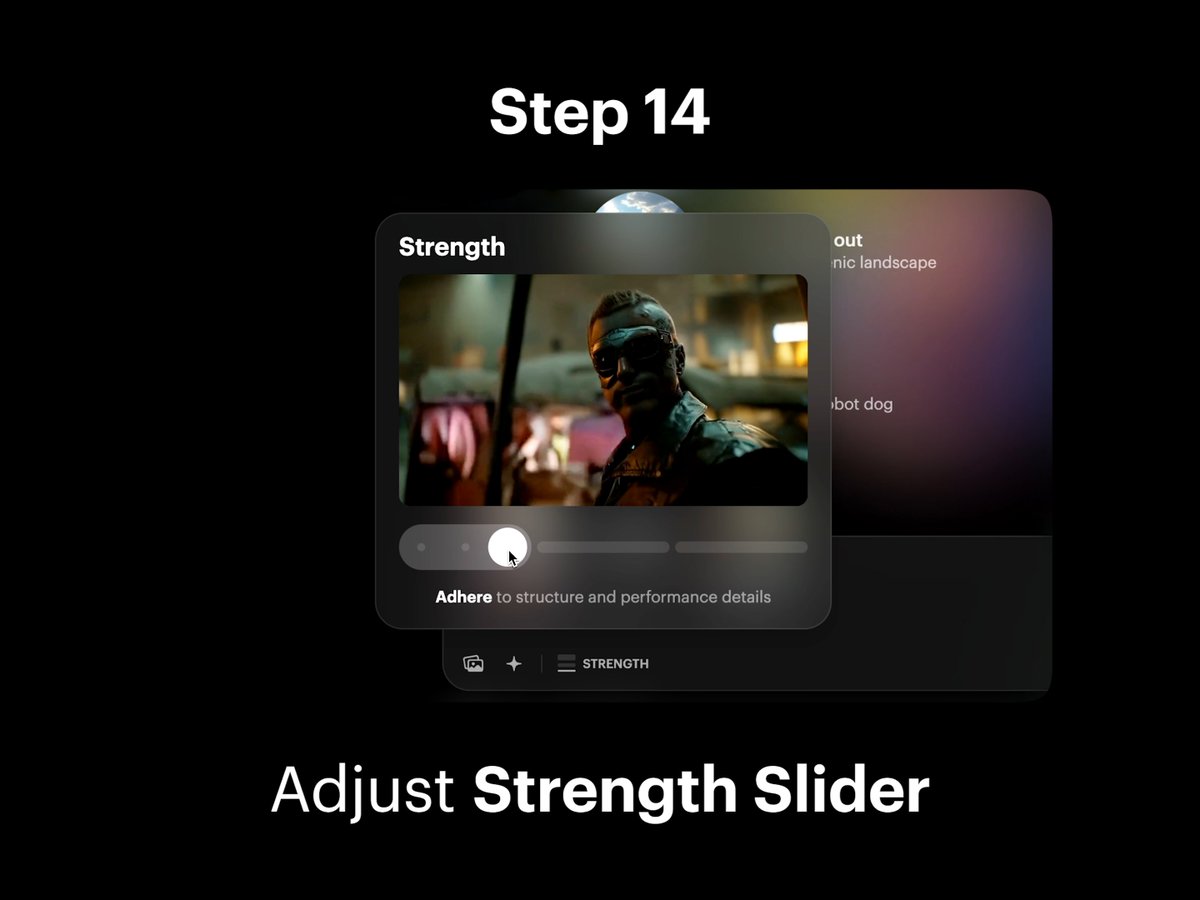
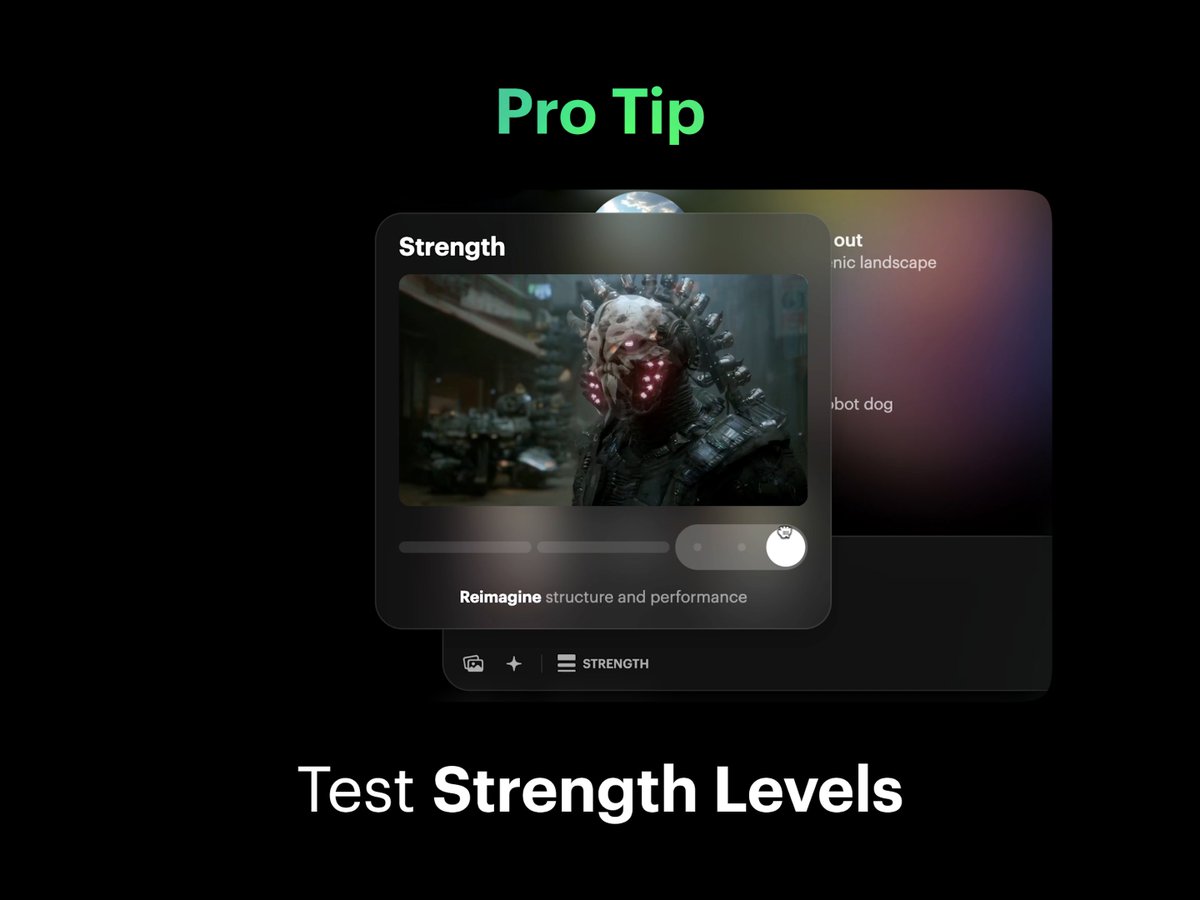
Pro Tip: Experiment with Strength Levels
Dial it low to preserve detail. Turn it up to dream bigger. Experiment with Strength intensity levels across the slider from Adhere, Flex, and Reimagine to see which works best for your video.
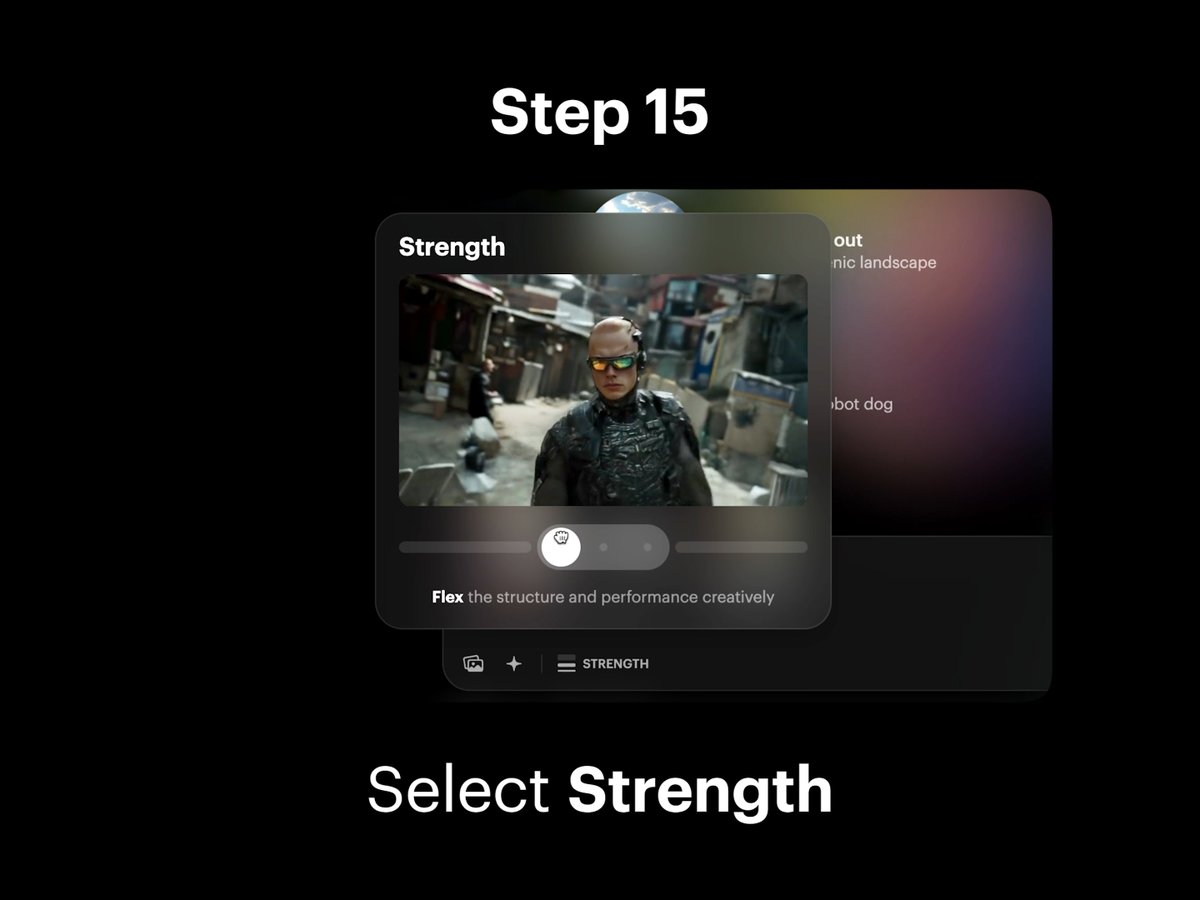
Step 15: Select Strength Level
Select and lock in your preferred Strength level. Flex 1 was used for this video example to achieve the desired effect.
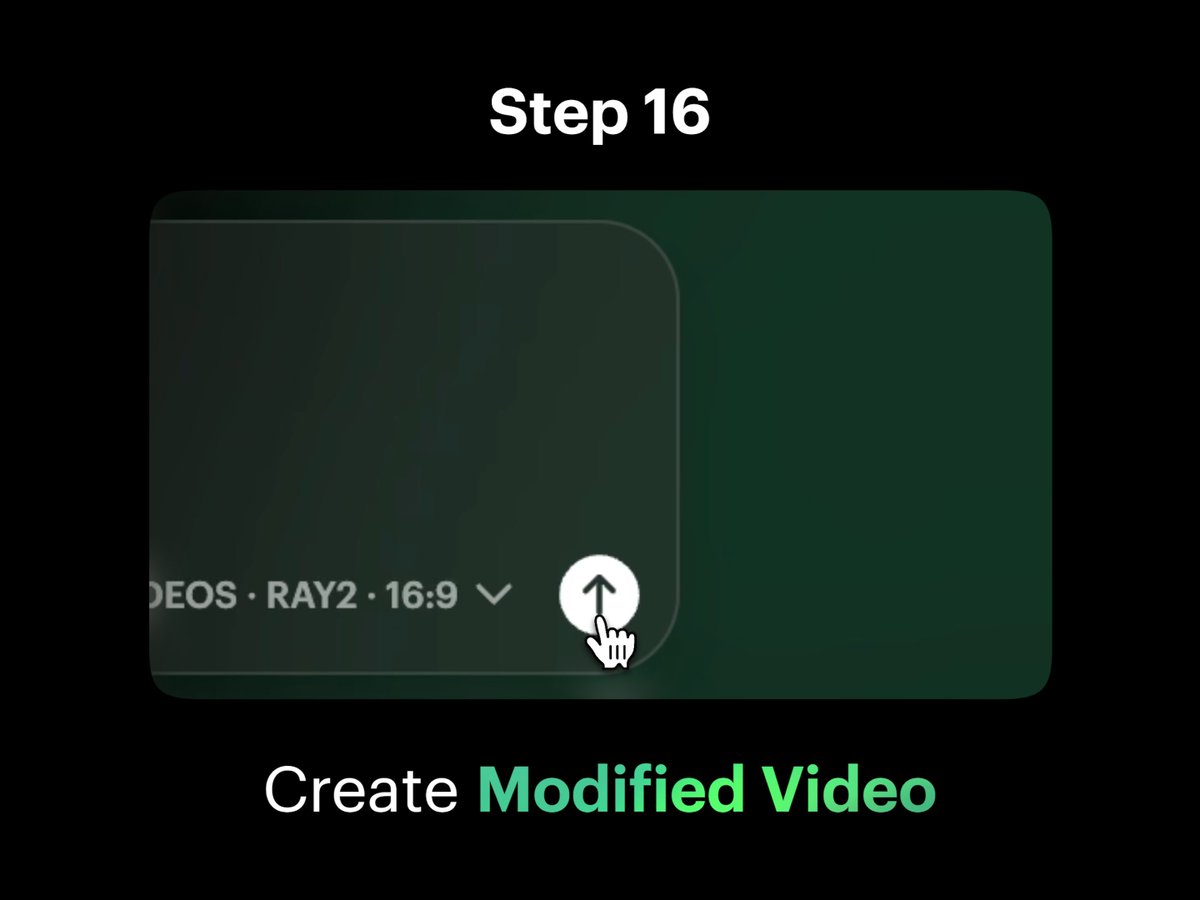
Step 16: Create Modified Video
Tap the Create button in the composer to make your levitating modified video come to life. This final step completes the process.